


Carrying a bike aboard can be extremely useful and nprovide you with additional enjoyment as you cruise (published October 2014)
 One of the main joys of cruising, for me at least, is exploring the various places I visit. My absolute favorite way to do this is by bicycle. Nothing puts a childlike grin on my face quite like cycling down a big hill. Also, I love the feeling of accomplishment after hauling a full load of provisions up on the return. And let’s face it, not much beats exploring those beautiful winding coastal roads going at the perfect speed of cycling. It’s easy to stop and visit the shops you pass along the way, you cover enough ground to be satisfied, and at the end of the day not only are you more fit, but you haven’t spent a single cent on transport costs. Best of all, bicycles make it easier to visit those more remote places you might not have time to walk to and may not be well served by bus or hitchhiking.
MYTHS BUSTED
Before we start covering the specifics, let’s get a few things clear. First, bicycles can definitely fit aboard your boat and are relatively easy to transport in a dinghy—provided you consider a few things carefully.
Bicycles can also easily be maintained to not rust in the salt air/spray, with a little proper care and some planning.
Last but not least, bicycles are super simple to fix and don’t require many special tools. You probably have nearly everything you already need in your toolbox.
TYPES OF BIKES
For our purposes, there are three main types of bicycles one might want to have aboard while cruising. Regular frame cycles, folding cycles and “take-down” or disconnecting-frame cycles.
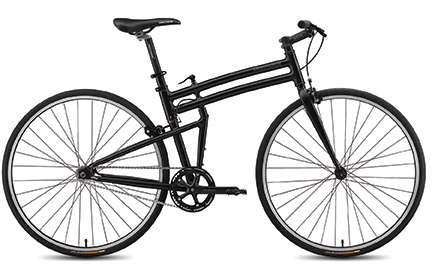
Regular Frame: These are the normal bicycles you see every day. They typically have 26-inch, 27-inch or 700c wheels (these numbers roughly correspond to the diameter of the inflated tire, but are definitely not exact so if you are measuring a space to see if your bike will fit, measure the actual tire instead), a fixed, solid frame, etc.
The main advantage is that these bicycles can often be the lightest weight, roll the easiest, have the best gearing, and due to the larger frame, can carry more provisions longer distances with ease.
To stow these bicycles, you need to remove the wheels from the frame and usually take the handlebars and pedals off. These are very easy steps that can be done with only a simple bicycle tool and a pedal wrench, but most people have not been taught how to do it, so it often seems impossible or daunting. Don’t worry, you can break down a full-sized bicycle for transport in under 10 minutes by yourself. Once broken down, these bicycles store easily in a cockpit lazarette or in a spare berth; even a quarter or pilot berth will usually fit these easily.
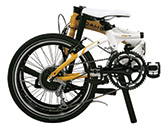
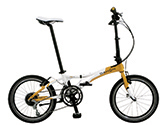
Folding-frame: These bicycles are specially designed to fold up as a complete package. They usually have very small wheels (20-inches or smaller), can fold with no tools and stow in about the same amount of space as two guitars side by side. Their main advantage is that because the frame also folds down, there is less disassembly effort and they fit in smaller dinghies and rowboats a bit more easily. They are also a lot of fun around the docks as the smaller tires and low center of gravity makes them quite nimble.
The trade-off is that they are a lot more effort and less stable in steep, hilly terrain and the small frame means they can carry less total load as there’s less space to put it. I rode a folding bicycle for nearly four years and found it entirely suitable for all sorts of short errands and flatter-terrain exploration, but when I started riding longer, hillier rides, my body wanted the extra reach and space of a proper road bike. I still have it, though, as it is the first bike I take ashore for doing the paperwork and other errands.
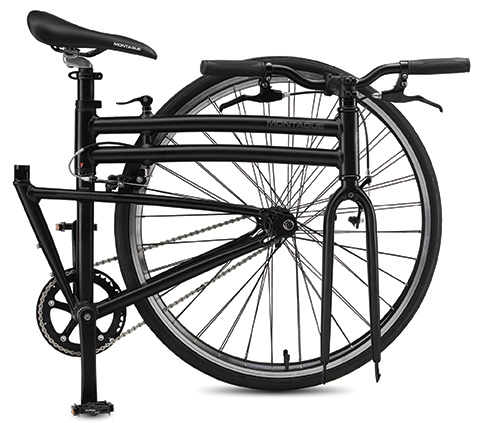
Take-down frame: These are sort of a hybrid between the regular frame bikes and the folders. They have a full-size frame and wheels (often 26-inches—the smaller of the road bike wheel sizes) but with a catch: clever S&S couplings allow the frame itself to disconnect and break apart into two separate pieces. This allows a take-down frame bike to fit inside a standard air-transport-sized suitcase and you can fly it without paying a bicycle fee (as long as you don’t declare that it is a bicycle, since some airlines charge the fee regardless of size if you state that it is a bicycle).
There really isn’t much of a downside to these other than the fact that they are a bit more expensive and a lot harder to find than a standard frame cycle and the takedown process is, again, a smidge longer than a folding bike—on the order of five to 10 minutes rather than 60 to 90 seconds. They have all the advantages of a full-size bicycle and stowage is the exact same, except you then proceed to break the frame down as well.
 STOWING BIKES ABOARD
The process for stowing your cycle for passage is relatively simple. First, disassemble or fold the bicycle on the dock for each type of frame. Follow up by cleaning any excess dirt off with a damp rag. Dry the bike and lightly spray all bare metal components (usually the gears, chain, spokes, hubs, seat and handlebar posts, and pedals) with a protectant. A light coat is all that is needed; excess oil will only attract dirt and drip all over everything.
Do not spray the rim of the wheels where the brake pads contact, nor the brake pads themselves. They will clean themselves of any rust very quickly after the next use and residual oil will cause the bicycle to not stop effectively, which is of course extremely dangerous. So be careful here.
Once the bike is cleaned and very lightly protected, wrap each component in a black plastic drum liner or heavy-duty garbage bag. I seal the ends with tape after getting as much air out as possible, roll them over like a dry bag a few times, tape again, and then wrap everything up tightly. This protects the frame from salt air and spray and keeps any oils or dirt from getting on your dinghy, yourself and your boat as you move the pieces aboard.
As with any heavy and easily damaged cargo, stow the components belowdecks or in sealed lockers. Firmly secure them so they don’t bang into each other or go flying in heavy seas.
Getting the bike to and from shore is also fairly straightforward. Frames by themselves are quite lightweight and even a large frame can be transported by dinghy without taking up too much space. The main thing to consider is that the sharp edges of the forks, gears and posts can cut through the plastic bag and expose the bike to saltwater when underway in the dinghy. So take care to protect those areas when transporting the bike. Because of the light weight, you’ll find it surprisingly easy to get even that awkward full-frame ashore.
SAFETY
Always have a helmet, front and rear lights and a small pack of spare tubes, a bike tool and a pump with you. These things are often difficult to find in other countries and it’s very inconvenient to get a flat while transporting a full load of groceries home. Also, countries have different regulations on safety for bicycles, so just because one country doesn’t require a helmet or lights doesn’t mean the next won’t. Canada, for instance, requires both a helmet and front and rear lights. And don’t forget a quality bike lock. Ask your shop to show you the most effective ways to lock up your bike to prevent accessories and important parts from “walking away” while you’re having that delicious calamari on the beach.
ACCESSORIZE
The varied uses for enjoying your bicycle are a big part of the fun. To transport provisions, picnic supplies, camping gear and other bulky objects, I strongly recommend Ortlieb “Roller”-series panniers along with Tubus racks. These true, waterproof dry bags can handle nearly anything you put in them. The roll-top style of the Ortlieb Rollers allows them to completely protect your gear heading to and from shore, while the instant clip-on aspect of the pannier mounts makes them simple to take inside as shopping bags.
To attach your panniers to your frame, you need a rack—preferably one each on the rear and the front of your bike to balance out the load. Tubus racks are a favorite of mine after years and miles of touring. There are many great brands of racks (Nitto and Velo-Orange are two other long-time favorites) but recently I’ve been using Tubus stainless steel racks for several reasons: they don’t rust easily, they are exceptionally strong and lightweight, they look good, and the Ortlieb panniers fit them perfectly.
I definitely recommend a front rack or set of “low-riders” for your bike. Carrying even a small portion of your cargo on the front of your bike will help you up hills, help you stop better with a heavy load, and generally balance the bike for safer handling. A front wire basket or canvas bag is useful for fruits and veggies, a small pet, or a light picnic, but if you intend to carry heavy loads with regularity, the low-riders and a pair of front panniers are the best way to go. (Protip: front panniers can be used as small rear panniers for quick trips if you don’t want the full size rears onboard).
TECHNICALITIES & TOOLS
One of the biggest obstacles I hear from people getting serious about biking while cruising are their concerns about maintaining their bikes. I can say this with entire confidence: bicycles are one of the easiest mechanical contraptions to work on. There is very little that is picky or finicky about a bike—even adjusting shifters is easy and you can learn it on YouTube (though I recommend you go to a local shop).
All you really need to fix a bike and do it well are:
• A bicycle pump that fits your bike tire valve. I recommend that you carry a frame pump or other largish pump on your bike frame itself (I use the Topeak Morph series pumps as they are fast, compact and much easier to use than standard frame pumps) as well as having a stand-up full-size pump onboard for bigger maintenance.
• A set of metric Allen keys (T-handle type are the most convenient, but not necessary),
• A couple normal screwdrivers (Phillips 0, 1, 2 and a medium flat-blade),
• A chain tool (about $9 at your local bike shop. Make sure you get the one that matches your bike chain. They’ll be able to show you how to use it).
• A pedal wrench makes putting on and taking off your pedals an absolute cinch. Pedals and handlebars are the more annoying parts of a bike when storing it, and anything you can do to make working with them easier is worth a couple bucks.
• A small bottle of chain lube and some spray lubricant/protectant such as Boeing T-9.
• A pair of quality wire cutters for trimming brake cables.
• A file for smoothing the ends of brake cable housings. You probably won’t need this, but you should have a file on hand anyway.
• And, if you want to get really “into” it, a socket that fits the freewheel or cassette hub on your rear wheel.
MAINTENANCE
Saltwater and sand can be hard on bicycles, but they don’t need to mean the end of your beloved ride. If you take your bike on the beach or down rough, dirty trails, it’s a good idea to rinse the gears and shifters with fresh water and let it dry thoroughly. Wipe off the accumulated dirt and grease every so often and give them another light, fresh coat of T-9. Re-oil the chain and generally give your bike five minutes of love every week or so and it will last as long as you need it to.
So what to do with these tools and how do you learn to disassemble your bike? It won’t take more than an hour or two, tops, and you’ll be as close to a pro as you need. In fact, a pro is exactly the best way to learn.
I recommend you take your bike into a reputable local shop and pay the shop mechanic for an hour of their time to teach you how to disassemble your bicycle. This should specifically include:
• Taking the front and rear wheels off and putting them back on.
• Changing a tire—actually do a complete change.
• Practice patching a tube.
• Take your pedals off and put them back on.
• Adjust your own seat height.
• Take your handlebars off (entirely off, though disconnecting the brakes and shifters isn’t necessary usually) and put them back on.
• Adjust your brakes and replace brake pads.
So, take a look at the storage space your boat offers, go figure out what kind of bike you want to take with you and in the time between lunch and afternoon beers go learn how to take it apart and put it back together. You’ll be surprised to find that it really is that easy and fun to take your own bike cruising. Now let’s go ride!
Daniel Collins, an ASA certified sailing and navigation instructor, amateur extra class radio operator and small boat racer, enjoys experimenting with marine electronics. He is also actively involved in community-driven social change. Email him at daniel@oddasea.com, or read his blog at www.oddasea.com. He owns Aletheia, an Allied Princess.