


Fitting a new cabin sole takes time and careful planning (published May 2013)
When we began the restoration and refit of our Pearson 424, S/V Regina Oceani, on the edge of a corn field in Colorado, some 39 months ago, I promised Admiral Jill, that I would not replace the cabin sole until I was done dropping tools on it. The idea of installing magnets in the headliner to “catch” tools on their way down never went anywhere. Although I may never actually stop dropping tools, all of the tough jobs of the restoration are behind us, so we finally reached that glorious stage of completion where I could safely install a new sole.
FINDING THE RIGHTEOUS SOLE
During the wait, we had plenty of time to ponder options. The old sole was a thin veneer of the traditional teak and holly strip pattern. This sole proved to be very fragile indeed —chipping, peeling and fading in places. An overlay of another thinly veneered plywood was out of the question. Plastic alternatives were considered but none had the truly rich look of real wood. This took us back to wood that was at least a quarter of an inch thick so it could be sanded from time to time if needed.
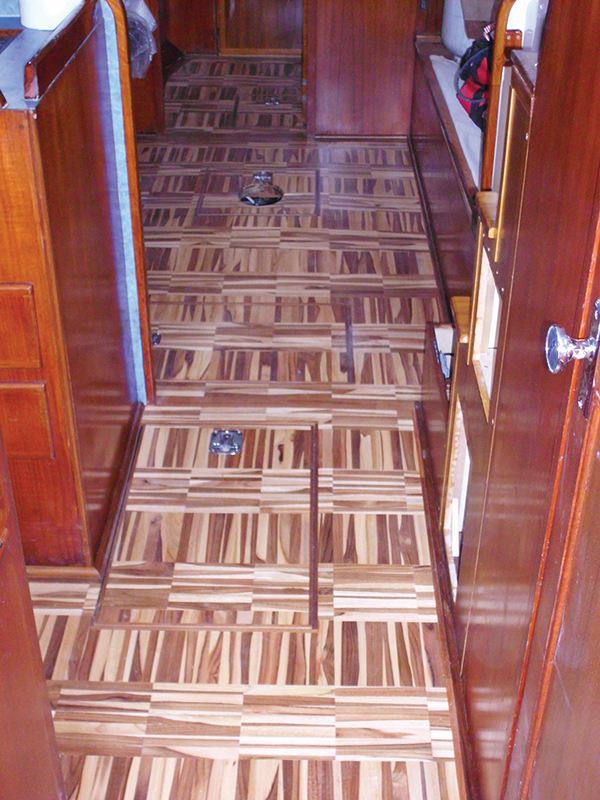
The newer look of “reverse striping” —where the wide strips are of a lighter-colored wood and the narrow ones of a darker wood such as teak—really seemed to brighten up the cabins of show boats. Holly has become fairly rare and is very expensive so it was out of reach for the wide white strips. We considered bamboo with narrow teak strips. I even glued up some prototype sections to see how hard that job would be. Let’s just say, tedious.
One day while shopping for thin teak on eBay, I stumbled across 60 square feet of “tiger teak” parquet flooring for sale. Neither Jill nor I had ever seen anything quite like it, but for Jill it was love at first sight. A sailing couple has to know each other’s’ strengths and weaknesses—when it comes to decorating, Pete weak, Jill strong. I ordered the flooring.
PREPPING THE OLD SOLE
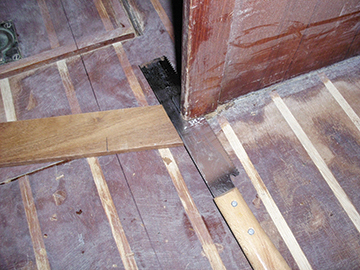
Knowing it would be replaced, I completely ignored taking care of the old sole. By this time it had accumulated epoxy, paint, and paint drips and, oh yes, a few more tool-drop dents. The first step was to give it a once over with a 60 grit orbital sander. I could have rented a floor edge sander but I figured the time saved would have been taken up driving to and from the rental center and I would still have some tight spaces that would require the smaller handheld sander. Once roughed up, I filled the joint lines between the old sole and the plywood over the new fuel tank and leveled out any irregularities with Alexseal Fairing Compound 202.
The next question was how to pattern the parquet panels. Each panel was about 24 inches long and six inches wide with the individual pieces held together with stainless steel wire running in narrow slots on the back side. The small strips of wood lay in seven by seven inch alternating patterns. It turns out there are three common patterns used for placing such panels: 1) parallel: align the lines across all panels, creating long continuous strips in each direction, 2) mosaic: offsetting the panels such that each square is adjacent to another with lines running perpendicular, or 3) scale: staggering the offset of the panels. After laying out panels in each of these manners, we settled on the mosaic approach.
With a pattern selected, optimizing the coverage, minimizing scrap, and cutting and creating logical coordination with the lines of the cabinetry and doors was the next challenge. A few hours of trial and error with sheets of the parquet, rulers and pencils resulted in a pleasing layout with lots of notes written on the old sanded sole.
Laying the sheets of parquet “wall to wall” would have produced a lot of scrap and I only had approximately 60 square feet of material to cover about the same area. Around the edges and at door thresholds, teak strips were used as trim or framing. This provided a very finished look in the end.
WHAT ABOUT THE HATCHES?
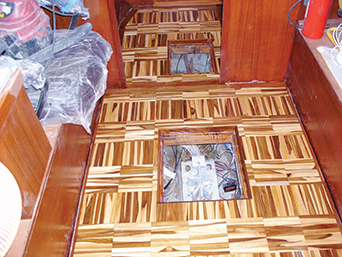
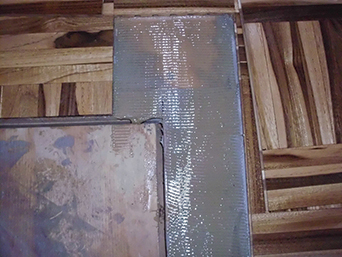
It was apparent that any mismatch of the patterns between the hatches and the field of the sole would jump out and look awful. To address this, as the sole was laid out without glue the hatches were covered with flooring and the flooring was marked with masking tape to indicate the cut lines for the hatches. Since the old trim around each hatch hole was to be replaced to bring the new trim up to the level of the new flooring and the old hatches were to have their edges banded in quarter inch teak, a half inch of fudge factor was created for the rough cutouts.
The flooring was then glued down with an odor-free polyurethane construction adhesive combed with a toothed trowel, leaving the hatches uncovered. The flooring around the hatch holes was trimmed flush with a router and the corners very carefully squared up with a chisel. The holes were then framed with quarter inch teak, glued with Gorilla glue and held in place with brads from a nail gun. The hatches were trimmed on a table saw to the dimensions of their framed holes minus two thicknesses of trim teak and an eighth of an inch for clearance.
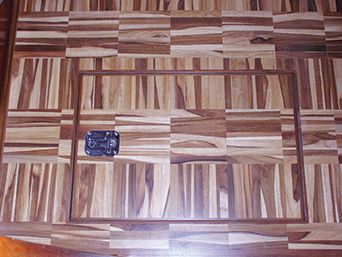
To align the flooring pattern on the hatches, they were laid into the holes and centered. Lines were then drawn on the hatches to indicate intersections with the alternating patterns of the glued down flooring. Back in the woodshop, the cutout fields of flooring were glued to each hatch, trimmed flush on the router table and trimmed with teak strips.
GETTING A HANDLE
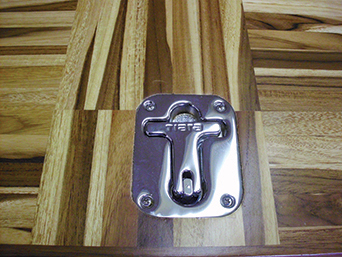
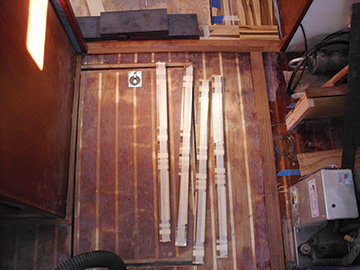
I wanted the hatches to be positively latched to the sole, as they should be in an ocean-going vessel. For this I acquired some Perko 777 latches, another great eBay find. Months before trying to set these in the fine teak hatches, I created plastic templates for routing the necessary deep and shallow holes and practiced installing the latches in pieces of birch plywood until I was confident of my technique. The creation of the templates was time consuming but very worthwhile when it later came to installing the latches. A small block of plastic was screwed into the hatch frame opposite each latch to catch the tongue of the latch.
A GREAT FINISH
With all of the flooring glued down, the hatches trimmed and the latches installed (and then removed), it was time to put the perfect finish on the wood. First I sanded the floor at 80 grit and then 120 grit. Next I made filler from the sanding dust and orange shellac and troweled it across the floor and hatches separately, to fill the slightest of gaps. Another sanding at 120 grit was followed by one at 180 grit. After cleaning the floor carefully, two coats of Bona DTS (dark tone sealer) and three coats of Bona Traffic waterborne, two-part, anti-slip satin finish were applied. In the end, these specialized products are more durable, less slippery and easier to apply than varnish. They are spread with a special sponge pad; it is more like directing a wave of fluid across the floor than painting. There are great videos on the internet about the application of Bona products. The last step was the installation of half inch quarter-round teak moldings that I had varnished back in the woodshop. I used a pin nail gun and a bit of Gorilla glue for this.
REAL SOUL
While this style of sole might not be for everyone and could potentially be “barfogenic” in rough seas—look out at the horizon, definitely not down at the sole. This sole has soul and is just one of Jill’s many great choices that will make the Queen our home at sea.
BWS is following Pete and Jill Dubler’s refit and restoration of their Pearson 424, Regina Oceani, on the hard in Fort Collins, Colorado. Pete emphasizes that doing the work yourself creates intimacy and familiarity with her systems and a special pride in your boat that writing checks just can’t offer.