


Without warning, the sudden dull pop of the spinnaker exploding shook us to our feet and into action. Thousands of miles to our landfall and with a limited sail inventory for downwind sailing, we needed to pull some rabbits out of hats (published June/July 2018)
It happens. Usually, it’s unexpected. And watching sails disintegrate is never a joyful experience. Sails blowing out are the result of any of a number of causes. Old, over-exposed thread, colder denser air providing a heightened force for a given wind speed, or just too much wind and pounding surf providing excessive loads that go beyond the designed specifications for the sail’s name but a few of the potential causes of failure. Most of those reasons for sail failure can be avoided if we, as sailors, live within our means, accepting the limits that our equipment has and honoring that reality. Of course, there are the unforeseen sudden gusts, an out-of-sync wave or other causes for failure, but many of the reasons are avoidable.
Chafe is not your friend. Protect sails from chafing on lazy jacks, spreaders, sharp objects such as split pins or other sharp edges. Some hazards can be taped over, and others can have a dab of silicon applied to soften the harsh or sharp edge. Lazy jacks can be especially destructive to laminated mainsails on the leeward side. When the main is reefed, the resulting sail at the foot can chafe in unexpected places for longer periods of time, leading to premature aging. Even the most diligently applied preventive maintenance and careful procedures sometimes result in a torn sail or dramatic blowout.
 If a sail blows out, get it down immediately and keep it onboard in the process to minimize additional damage. If the damage is to your mainsail, and you need it to continue moving, you may be able to reef beyond the damage. In any case, your first thought should be about damage control, and limiting that damage from worsening.
How you are able to repair your sail will be partially determined by the extensiveness of your sail repair kit. For extended passages, I fill a small duffle bag with the following items:
Needles of various sizes
Waxed thread
Sewing palm that has a reasonably comfortable fit and doesn’t have sharp edges which can cause blisters if used for an extended period of time
Double-sided tape (sticky on both sides of the tape to quickly put seams together prior to stitching if necessary)
Sticky-back Dacron (large sheets for repairing spinnakers or large holes)
Sticky-back Dacron (4″ wide rolls for long fabric tears or to use for anti-chafe on top of stanchions, the back side of spreaders or elsewhere)
Sticky-back, high tensile fabric (Kevlar / Carbon or Spectra large sheets for mainsail repair)
Sticky-back, high tensile fabric (4″ rolls for long tears in high stress areas of sails)
Sail ties (10 each, 8′ long to be used for repair purposes if necessary)
Pliers
Long, heavy-duty scissors
Hot knife (butane preferably so it is portable)
Hair dryer (either 110v or 220v, depending on the vessel’s electrical system)
Rubbing alcohol for removing salt and drying sails quickly prior to a repair using sticky-back material
Various sizes of webbing, preferably tubular since that is stronger than single-ply webbing
Spare battens or splinting material
In addition to the above items you might also include hardware such as spare slugs for the main sail, spare hanks or climbers’ carabiners for use in a hank-on headsail or other types of hardware that you use in conjunction with your sail inventory, such as shackles for tack and head fittings or high tensile line to be used in lieu of bolt rope. Few boats carry such an extensive sail repair kit. Eventually, many wish they had. And, in fact, I’ve used every item mentioned above at one time or another, happy to have the right repair equipment available.
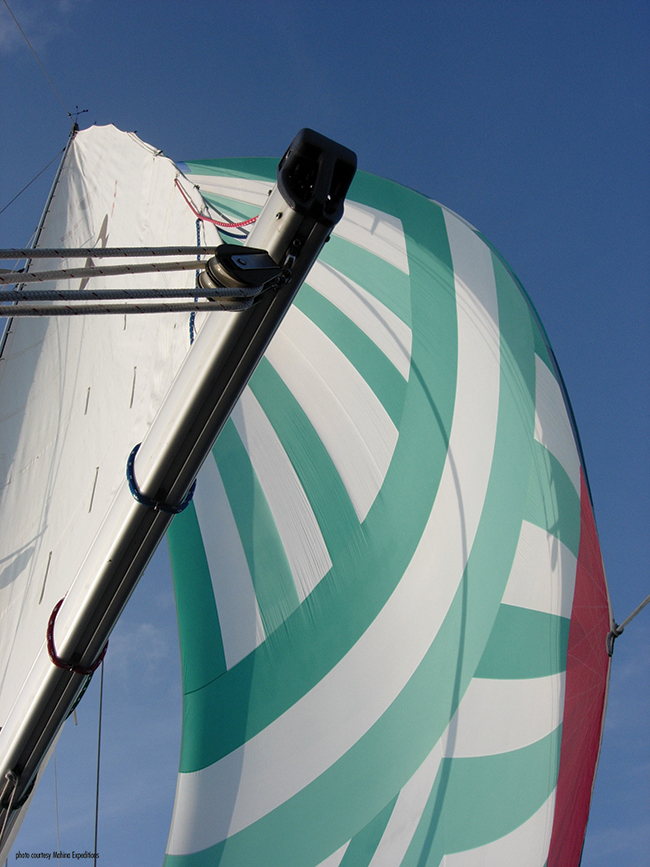
As we were delivering a Gunboat 48 catamaran from Cape Town, South Africa to Norfolk, VA, we were sailing downwind in sunny, warm, stable conditions in the South Atlantic. Suddenly, and without warning, the spinnaker ripped an eight-foot gash across the upper third of the sail. We scrambled to get the sail down before it got worse. However, in the process of taking the chute down, the tear worsened, and the lower part of the sail fell overboard between the two hulls. As we began to overrun the sail, the damage only worsened. Slowly, we brought the sodden heap back onboard. It appeared to be a devastating blow to our progress, given the fact this was our only true downwind sail, and we had more than 5,000 miles left of our passage. We got to work, using the sail repair kit described above.
Fortunately, the tear was along a seam. We didn’t lose any material, and it was a relatively straight rip. We took the sail into the main salon, carefully spreading the chute out, isolating the torn area on which we would begin work. Starting at one end of the rip, we carefully cleaned the area around the failure, using fresh water to clear away the salt and using a little rubbing alcohol to help accelerate the drying process. We were able to match one side of the tear with the other. For the full length of the rip, we carefully applied a line of 4″ wide sticky-back Dacron. We applied that strip in 10 inch to 12 inch lengths so we could keep the mend consistent and the edges of the original material in close relationship to the way they were originally aligned. After we applied a strip of the sticky-back, we used the handle of a scissors or screwdriver to rub the sticky-back Dacron vigorously, firmly pressing the sticky-back to the torn sail and generating a little heat with the rapid rubbing friction. We went through that process on both sides of the sail, applying the sticky-back to both the inside and outside of the sail. Five hours later, to the amazement of the boat’s owner, we re-hoisted the sail. The repair lasted for the remainder of the trip, at least 3,000 miles of which was sailed downwind with that sail pulling the cat.
 Different sails, types and weights of sail cloth and types of failures deserve different types of repairs. You may be able to make the repair stronger than the original sail in that particular area, but that approach is of little value and may put stress on the adjacent parts of the sail. When making your repairs, take your time to do the job correctly. Doing it wrong may mean doing it again – if the next failure doesn’t result in complete destruction of the sail. Try to make sure that new seams are not puckered. If your repair looks like cosmetic surgery out of a Frankenstein movie, it probably won’t last long through the next puff of breeze. If you are stitching the sail together or tacking down the self-adhesive sticky-back material, realize that too many stitches and needle holes weaken the overall sail in those places. Failure can again occur if a tear results by connecting the needle holes. When you resume sailing, understand that your sail is probably weakened, and reduce sail area accordingly.
On a few occasions, while racing in wild conditions with experienced sailmakers onboard, we have re-built sails after some of the material was completely destroyed or lost. Admittedly, the sail was a bit smaller, but it still worked. You CAN put it back together again. Get to work and give it your best shot.
The best repairs are done with the right tools and some practice. Occasionally, you may find yourself without one or the other. If I really needed a sail to get somewhere because of extended distances, lack of diesel fuel or other extenuating circumstances, I probably wouldn’t let either the lack of a proper sail repair kit or lack of experience stop me. Please don’t tell any sailmakers where you got the idea, but if forced to do so, I might even stoop to using Duct tape to repair a sail. Of course, it will need to be cut away later, further causing damage to the sail, but in an emergency, a lot of things will work in the short term that you may regret in the longer term. I will caution, however, that the use of 5200 for sail repair does require parental supervision and a complete disregard for doing things the right way.
A few words to the wise would include, “take care of your sails but be well prepared for the ‘unforeseen.’” Eventually, the unforeseen will happen and having the right kind of sail repair kit and some knowledge of how to use it will serve you very well.
Bill Biewenga is a navigator, delivery skipper and weather router. His website is www.weather4sailors.com. He can be contacted at billbiewenga@cox.net