


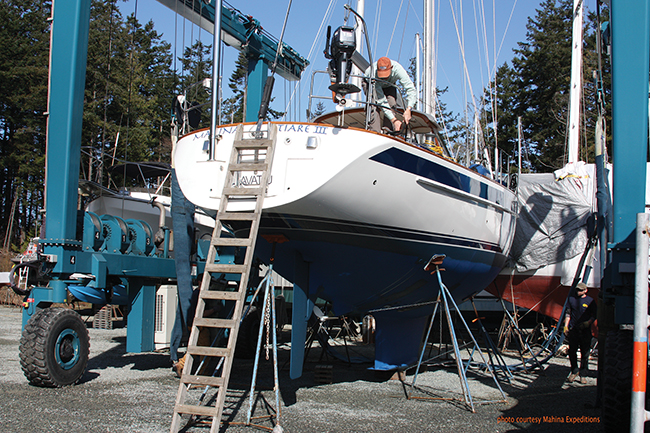
Whether you are getting ready for a spring launch or going through your annual haul out, here’s a guide to the essential tasks (published April 2018)
Most cruisers are fairly hands on and will undertake many if not most of the chores in an annual prelaunch refit when getting our boats ready for ocean sailing and another summer or year of cruising. Here’s a look at the basics.
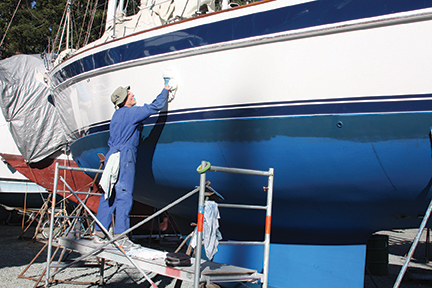
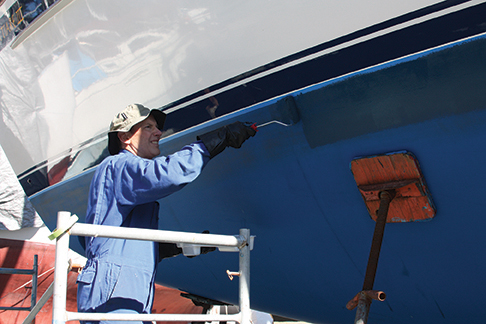 ANTIFOULING
Racers want a hard, slippery, fast underwater surface and don’t mind diving under the boat to clean the bottom regularly. But cruisers really need antifouling that will last a long time and will not require a lot of between-haul out maintenance. That means we’re looking to apply a coating that has a lot of punch and includes both a lot of biocide and a slime fighter.
Tin based antifouling paints are the most effective but they have long been banned in the U.S. and most of the modern world where environmental policies are stricter than in the Third World. The next best thing in bottom paint is copper or cuprous oxide and this, too, is in the cross hairs of states and the EPA since it is poisonous. But, for most of us copper-based antifouling paints are the best bet.
Look for paints with a high percentage of copper like Micron 66 or Pettit’s Trinidad and make sure the paint has an anti-slime additive such as Irgarol. The copper will ward off barnacles and organic growth while the anti-slime additive will prevent slime from building up along the waterline.
In states or countries where copper-based paints are regulated, you have to go with different formulations and the best seem to be based on ECONEA or zinc biocides. These are more eco-friendly and that’s a good thing. The downside is that they do not work as well as copper-based paints so you have to add more coats at a higher cost.
Most cruisers opt for co-polymer formulated ablative paints, straight ablatives or modified epoxy paints. Ablatives slough off molecules as the boat passes through the water steadily exposing new layers of the biocide. This also means that if you are moored for a long time in a high growth body of water, you can quite easily scrub the bottom clean. And, ablatives don’t build up layer upon layer with repeated paintings. Modified epoxies are hard paints that can be sanded very smooth and can last and be effective for a long time. These paints do build up layer upon layer so you have to sand very thoroughly between seasonal repainting.
For long haul sailors who will be 12 to 24 months between haul outs, you have to apply at least three layers of ablative paint and two good coats of modified epoxy paints to ensure that the effectiveness of the biocides will go the distance for you.
If you know you are going to own your boat for many years and plan to sail in areas where hauling out is ether not possible or inconvenient, then you may want to consider applying Coppercoat to your boat’s bottom. It is more expensive and takes a lot more prep work than regular paint but it will be effective for five years or more.
 WAX THE TOPSIDES
Gelcoat, even white gelcoat, and modern marine paints will tend to fade slowly in sunlight. To preserve the boat’s hull as much as possible, it is wise to give the hull a good polishing or waxing once a year. So, give it a good cleaning with a soft brush and non-scratching pad where necessary and rinse it very thoroughly.
Then, with one of the usual polishing products from StarBrite or another brand, apply a nice thick coat of polish and then steadily wipe it off with a soft cloth. This is a boring job that’s hard on the shoulders but we always find ourselves quoting Mister Miyagi: “Wax on, Wax off, Danielsan.” That’s small consolation but it’s better than nothing. And the boat will look great afterwards, too.
 INSPECT THE RIG
We always go up the mast and give the whole rig a thorough inspection before heading off on a long passage and if we are not heading offshore we reduce the process to one good annual inspection. The whole point of the inspection is to catch any potential failures before they happen and to make sure everything aloft is working properly.
When you go up in the bosun’s chair, there are a few items you should take with you so you can make repairs if necessary: white rigging tape, black electrical tape, screwdrivers, seizing wire, wire cutter, tube of silicone, WD-40 with a nozzle, spare cotter pins or ring pins and a magnifying glass. Before you go aloft, turn on the masthead and steaming lights and if they are not working, take replacement bulbs with you.
Start at the masthead and check all mounting points for your instruments, tricolor and antennas. Make sure that bases are secured and that there is no chafe on the wiring. Make sure the hole in the mast where the wiring passes is well filled with silicone so the wires don’t chafe on the aluminum. Check the shackle on the roller furling gear and re-seize the pin if need be.
Check the tangs and end fitting on the stays and look for rusted stands near the swage or mechanical end fittings. Use the magnifying glass to get a close look at any discolored strands. If the ends look okay and are dry, smear some silicone around the joints to prevent water ingress that can cause corrosion.
Check the shackles and blocks on spinnaker halyards and seize the shackles if necessary. Check the halyard sheaves carefully and make sure they are turning easily. Squirt a good dollop of WD-40 onto the sheave’s sides to lubricate and protect the pins.
As you come down the mast, check all tangs and end fittings and make sure the spreaders are well attached to the fittings on the mast. Remove the white rigging tape and spreader boots and check all attachments and fittings. Then, replace the boots and tape up the joints to avoid sail damage. Check the sheave or shackle on the topping lift and lubricate it with WD-40.
Check the mast step for corrosion and make sure the fittings where the mast wiring goes through the deck are all water tight. Smear silicone on any joints that look suspect. Check the gooseneck for wear and tear and corrosion around stainless steel pins and apply WD-40 liberally.
Once you have checked the whole rig, you want to make sure the mast is straight, the stays are tight and the mast is set up with the amount of prebend you and your sailmaker decided on.
 ROLLER FURLING
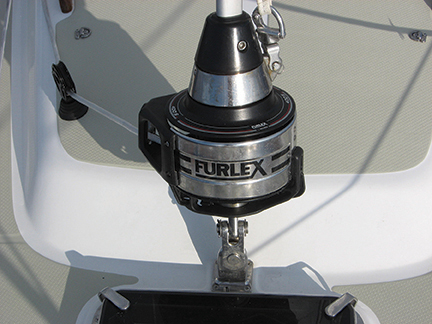
If the boat has been stored with the mast up, you would have removed the sails to store them in a safe place below decks. Before you put the sail back on the furler prior to launching, it is wise to give the whole roller furling system a good inspection.
The device is made up of the drum and bail at the bottom, the turnbuckle and lower clevis pin, the individual foil sections which are usually eight feet long, the fasteners that attach the sections together and the top swivel.
At the bottom of the lower turnbuckle, check the chainplate for discoloration or cracks and make sure the clevis pin is well secured with a split pin and then taped with rigging tape. Check the furling line for UV damage or wear and replace if necessary. On systems with open bearings, flush the bearings with hot water to remove dust and dirt. On drums with sealed bearings, you don’t have to worry.
Using the bosun’s chair, have yourself hoisted up the stay to inspect the joints, fasteners and top swivel. Just tie the chair to the foil sections with a small loop of line so you don’t swing backwards. You may need tools such as Allen wrenches, LocTite, spare fasteners and WD-40. Look for set screws that are loose, for fasteners that are not in place and for joints between sections that are not tight and stable. Any loose set screws should be removed, cleaned, coated with LocTite and reinstalled. At the top, check the swivel and give it a good shot of WD-40.
 WINCHES
A simple but messy task during a refit is to clean and regrease your winches. When a winch sits for a long time, the grease inside tends to coagulate and become thick and less viscous. This will cause the bearings to bind up and will make trimming sails or raising halyards more difficult. Also, it is not good for the bearings, pawls and springs to get gunked up.
All you have to do is take the winches apart and clean the parts with a solvent that will dissolve the old grease. Once clean, you have to judiciously regrease the bearings, drums, pawls and put it all back together again. If you know what you are doing and have the required tools, it takes about 15 minutes to clean and grease a winch.
STEERING SYSTEMS
Steering systems are the most exposed to hardship of any system on a cruising sailboat. That’s because the forces of moving water and waves on a rudder can be immense, particularly in large waves when the boat is falling off waves or being overtaken by large rollers. The steering system is always in motion and always dynamic, so it is important when fitting out to check it from top to bottom.
Most modern cruising boats have either a chain, wire to quadrant design or a bevel head, torque tube to quadrant system. A wire system will have more play in it since the wire will stretch over time and under load while torque tubes do not stretch.
To start the inspection, turn the wheel or wheels hard in both directions and look for any play in the system. If there is no play, you are in luck. If there is, you will need to tighten the wires at the quadrant or look for weak fasteners in the installation of the torque tubes, most likely where the tubes change direction.
On both types of systems, check points where the tubes or the wire goes through a fixed point, either sheaves for wire or mounting brackets for tubes. This is where failures often occur. At the quadrant, inspect the cast quardrant for cracks and the key in the rudder that keeps the quardrant aligned. Check the autopilot attachment to the rudder post and the key for that. The autopilot arm should not be attached to the quadrant but to it’s own small tiller; that way, if you have a steering system problem, the autopilot can still steer the boat. Also, quadrants are not designed to withstand the sudden jarring motion of a big wave twisting the rudder and extending the arm violently.
If the boat is out of the water, grab the bottom of the rudder and try to manipulate it sideways. If there is any play, you may have bearing issues or cracks in the rudder mounting installation and you should have a boat yard specialist look at it. In the water, inspect the thru-hull for leaks or cracks.
THRU-HULL FITTINGS
Modern cruising boats have many holes in them below the water and each one is a potentially serious problem. The seacocks are all that stand between you and a huge leak, so you need to make sure you check each one carefully. Make sure the valve turns easily and that there are no signs of corrosion or electrolysis. If the seacock has a grease nipple, pump a little grease into it and then open and close it repeatedly.
The seacocks are all attached to internal plumbing hoses and made fast with hose clamps. Each hose needs to have at least two high quality stainless steel clamps that are in perfect condition and screwed down very tightly. Check for signs of rust, cracks in the clamps or weakness in the hoses and replace any that are suspect.
Also, make sure you have the appropriately sized wooden or rubber plugs always handy on the boat so you can block a failed seacock quickly.
 ENIGINE AND GENERATOR
It is customary on marine diesels to change the oil and filter on the engine and genset when a boat is hauled out for the winter or for an extended stay on the hard, say, during hurricane season in the tropics. This removes impurities from the oil in the engine and will reduce internal corrosion. Then, when you are back in the water, run the engine for 10 hours or so and change the oil again to remove any impurities that appeared inside the engine while it was sitting.
It is also normal to top up the fuel tanks when the boat is being laid up to reduce condensation in the tanks. You should also add a fuel additive with a biocide that will emulsify water in the tank and kill any bugs that try to grow in the water droplets. The fuel should be fine when you go to relaunch but monitor the fuel filters carefully for the first 10 hours to make sure nothing is growing in the tanks.
The general checkup of the engine during the fitting out should include changing the fuel filters and draining off any water that is in the filter housing, changing the raw water impeller that may have grown brittle from disuse, tightening or replacing the belts, which also might have become brittle or developed hard spots where they turn around the small pullies, and checking the anti-syphon loop in the raw water plumbing. The transmission fluid should also be changed with the appropriate fluid.
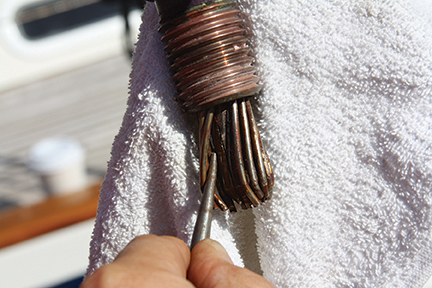
The heat exchanger on the engines are liable to develop scale that can block the passages, reduce water flow and cause the engine to run too hot. There are several ways to check this but the best is to take the ends off the exchanger and have a good look. On some engines, the passages can be cleaned manually. On others, with delicate fins, you have to flush the passages with a moderately weak solution of muriatic acid that will melt the scale but not the metal.
The engine will have several zincs that will need to be checked and replaced. These are usually in the heat exchanger and in the back of the exhaust manifold but there may be others. We had an old Volvo MD model that had four zincs that needed to be replaced annually and one on the prop shaft.
If you have a standard shaft, check the flange that attaches it to the transmission; if you see that is it fitting poorly, you may have to align the engine and for that you may want to call in a seasoned mechanic. Where the shafts exits the boat, inspect the stern gland and make sure it is functioning properly. An old packing gland should leak a little while running the engine but not when the shaft is not turning. The modern Lasdrop shaft seals shouldn’t leak; if it does, you may need to tighten it slightly.
If you have a P-strut for the shaft, inspect the fasteners inside the boat for any corrosion or cracks in the fiberglass. Outside the boat, grab the shaft and try to move the P-strut side to side. If there is any motion, you need to address how the strut is attached to the boat and correct any problems. Don’t forget to change the zincs on the shaft and propeller.
On saildrives, check the rubber gasket under the engine for leaks or any discoloration from spilled oil or fuel. Out of the water you can check the saildrive and change the oil easily. You should also change the zincs. The saildrive is aluminum so don’t paint it with copper paint. You should coat it with a zinc-based antifouling paint.
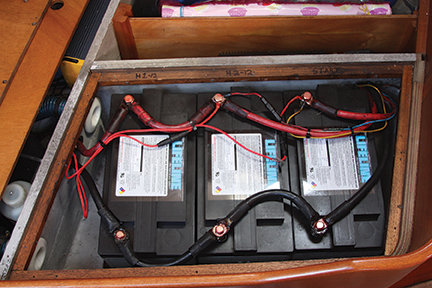 BATTERIES
Your batteries do not like being left unused. They die a slow death when they are left to slowly discharge. Hooking the boat up to shore power through your battery charger, will maintain the batteries for a while but there is always risk of fire so you need to have the boat checked regularly.
If you have solar panels, you can leave the batteries hooked up in the boat and let them self-maintain while you are away and that’s one very good reason to add at least one panel. But if you don’t have a solar panel or shore power, then you need to find a way to keep the batteries charged. That will usually mean finding a warm place for them where they can be hooked up to a maintenance charger.
When you are ready to head back into the water, you should try to keep the batteries in the top third of the amp-hour cycle for a week so the batteries get used to the discharge recharge activity. This is less important with gel cell and AGM batteries but still a good practice. Wet cell batteries need to be reconditioned after a long lay over so you will need to give them a high voltage charge for a few hours to burn the scale off the batteries’ plates; for this, you will need an adjustable smart charging device, which should really be a basic element of your energy system onboard.
WATER TANKS
Chances are you left the water tanks empty and flushed some sort of either non-toxic antifreeze or a solution of bleach to keep them healthy while the boat was not being used. When you are ready to start fresh with the next launch, it is good to start with tanks that are as clean and fresh as possible.
A simple solution is to mix up a couple of five gallon pails with a mild bleach solution, pour it into the tanks and pump that through all of the boat’s fresh water plumbing one faucet at a time. When done, flush the whole system with fresh water and you are done. This will help to contain any growth in the plumbing system and cut down on any odor.