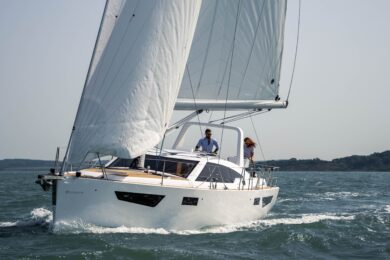


Regina Oceani‘s rehab continues (published January 2012)
As the restoration and refit of our Pearson 424, Regina Oceani, continues—her inner being now strong and solid with a new engine, plumbing and some new cabinetry—we turn to her exterior facelift, where paint is the fountain of youth. Our painting encompasses four phases: spars, decks, hull and bottom, each to be covered over several installments.
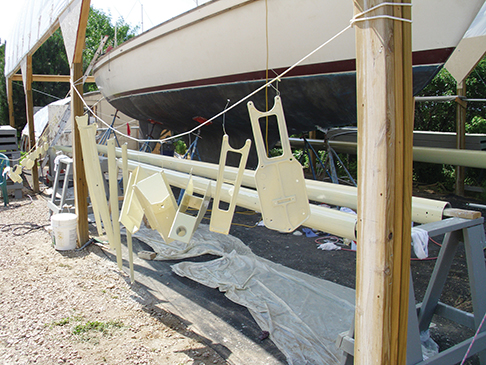
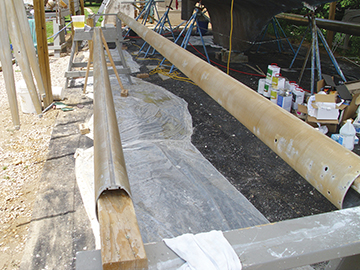
We started with the preparation of the spars (two masts, two booms, spreaders, and miscellaneous brackets and mounts) in the early spring and completed the painting when our Colorado weather was more reliable in early July. Getting experience spraying paint on parts that will be far off the deck seemed like the most logical learning ground. During these months, we also constructed a shelter over the boat—critical to good results when painting and necessary when we later open up so many holes in the decks in preparation of that phase of painting.
PICKING THE PAINT
 Our criteria for paint were high durability and high beauty. Two-part polyurethanes are the industry standard for meeting these criteria. The top coat, however, is only a small part of the story. The compatibility and workability of all of the paint system’s elements makes the difference between an average “30-foot” job (one that looks good from at least 30 feet away) and a true new-boat appearance.
There are a few shortcomings of polyurethanes. While expensive polyurethane paint systems are hard to scratch, once damaged they are difficult to repair. Spot repairs usually show “halos” that stand out. The alternative, acrylic paint, while easy to repair, does not have the durability required for the challenges of the marine environment.
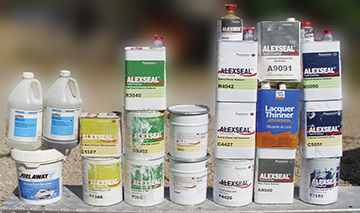
In 2002, Mankiewicz of Germany asked 150 chemists to design a new paint system for yachts that combined five key characteristics: hard to scratch, easy to repair, easy to apply, high color retention and highest gloss. They accomplished this with the Alexseal system, which is an aliphatic polyester urethane; read all about the chemistry and why it behaves the way it does on www.alexseal.com. These paints have been used on many of the world’s largest yachts, but they are also available to the public. Mankiewicz even makes the paints that are used on the Airbus A-380; to my way of thinking, a paint that can handle 600 mph winds is clearly tough enough for the marine environment.
SPRAY OR ROLL?
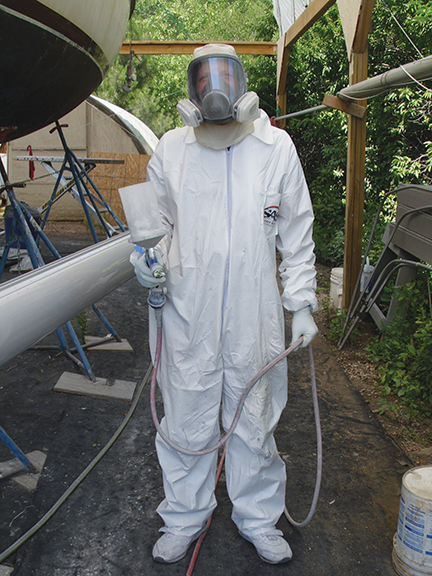
 There are reasons the professionals spray instead of roll or brush paint: superior finish and time efficiency. The difference between an amateur and professional applying paint is that the latter is paid for his time. Nevertheless, these paint systems are typically labeled “for professional use only” for one very good reason: the top coats contain isocyanates, which are very toxic once atomized by a spray gun. Proper respiratory protection (plus eye and skin protection) is mandatory. The primers are less dangerous, but the same protection should be employed.
The roll-and-tip method can be used with Alexseal simply by using the reducers and converters made for brushing; the toxicity risks of atomized isocyanates are thus avoided. I, however, chose to invest in a quality spray gun system and sought advice from “Professor Spray,” Mike Davis, who lives spray guns (www.spraygunworld.com). You can buy spray guns for less than $20, but there really is a difference in quality. Mike explained that after the choice of paint, a good sprayed finish is dependent on the consistency of the droplet size, which is the result of the combination of the air system, a well-machined gun and the right selection of nozzle sizes. Mike and I discussed a number of systems and the five levels of gun quality available. Since I have access to a large air compressor on the farm, we settled on the C.A. Technologies Techline II gun with four fluid nozzle/needle combinations (1.3, 1.5, 1.7, and 2.2mm) and two air caps. C.A.T. is a Boulder, Colorado-based innovator whose claim to fame is some of the most precisely machined spray gun nozzle systems. The nozzles used on my spray gun, one of their economy models, are the same ones used on the robots that paint Lexus cars.
If you have to settle for a smaller air compressor, don’t let it keep you from spraying. Some European and Japanese guns use as little as 5 to 6 cfm at 40 psi and do a very respectable job.
PREPPING THE STICKS
 Paint and equipment selected, the many hours of stripping the spars down to bare aluminum began. Removing hardware and repairing holes in the spars was perhaps the most labor intensive part of the project. After 30 years, likely without any anti-seize lubricants applied at first assembly, removing the stainless steel screws and bolts from the aluminum spars took a variety of approaches including penetrating lubricants (PB-Blaster and Kroil), heat from an oxy-acetylene torch, impact wrenches, vice grips, and in all too many cases, drilling out the bolts with cobalt drill bits. Many holes lost their threads in the process. These and holes that would not be reused were drilled out to a larger size, tapped, and filled with threaded aluminum rod held in with a permanent thread locker fluid. After the rod was in the hole, it was sawed off with a hacksaw and ground smooth with a 40-grit flap wheel.
The last step to getting to bare aluminum was the stripping of the remaining paint. Erik Gertsen of Dumond Chemicals (www.dumondchemicals.com), the makers of the Peel Away and Smart Strip paint removal systems, explained that removing paint safely and easily is a matter of selecting the right stripper for the job. Methylene chloride-based strippers will remove just about any coating, but are harsh, poisonous and can burn the skin. Dumond makes a biodegradable stripper ideal for removing polyurethane and epoxy finishes from metal called Smart Strip Pro, which does not burn your skin (you should still wear gloves and eye protection).
The keys to a clean strip are the thickness at which the stripper is applied and its dwell time on the surface. To build an approximately 1/8” thick coat of stripper, I applied two coats using a large masonry brush. Covering the stripper during the dwell time is not mandatory, but I used plastic wrap running lengthwise on the spars. This turned out to be a good choice, as the next day the plastic wrap with the paint largely rolled off directly into an awaiting trash can. A little rubbing with a thick, course Scotch-Brite pad followed by a rub down with denatured alcohol removed the last of the residue and paint.
READY TO RECEIVE
 Now I was ready to start priming. Instead of sanding the aluminum, I chose to chemically strip all oxidation off with Alumiprep and then passivate the aluminum with Alidine, sealing it from further oxidation, before applying the Alexseal chromium-free metal primer. Alumiprep and Alidine are easy to use—brush or spray on and rinse off a few minutes later. This leaves the aluminum a golden color and ready to receive the two-part yellow-colored metal primer ,which was sprayed in a single coat.
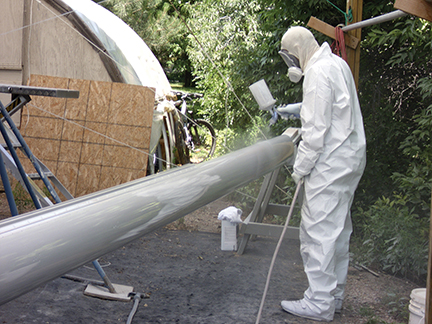
Without any sanding, three coats of the white two-part Alexseal Super Build 302 primer were sprayed the next day. This thicker paint requires a 2.2mm nozzle and special matching air cap on the spray gun. The primer base and converter are mixed and allowed to “induct” for 15 minutes before the matched system reducer is added to thin the paint for spraying. I used the Devilbiss DeKup system of disposable cup liners on my spray gun, which made cleanup easy and reduced the amount of solvent used. Recognizing that I would be stirring many cans of paint, one other useful piece of equipment was the air-driven paint shaker that I expect to sell on Craigslist to another budding painter.
GETTING TO SMOOTH
Let the sanding begin! Simply pushing a block with sandpaper on the surfaces will produce a smooth-feeling but wavy surface. Mastering the technique of “block sanding” produces a truly fair surface. Stroking a medium (11”) hard foam block diagonally while keeping the block’s axis in line with the axis of the spar is both efficient and effective. I watched some YouTube videos on block sanding to get started.
The slight gloss of the primer was used as a “guide coat” for the first sanding. Any gloss left must be a low spot. If the yellow metal primer appeared, I immediately stopped and knew I had a high spot to fix with more high-build primer and careful block sanding. After the first block sanding, I applied a light black guide coat. I tried both spray cans and “guide dust” and found that the latter had better coverage at a lower cost. The guide coat was sanded off at 150-grit using the residual black as the guide to locate low spots, which were then filled with either more high-build primer or Alexseal 202 fairing compound. The faired areas were then spot primed with high-build primer, which in turn was again lightly sanded. Within a few iterations, all of the spar surfaces were magnificently fair and true.
After blowing off the dust and wiping down with denatured alcohol using the two rag technique—one applying, one removing—three coats of Alexseal Finish Primer 442 sealed the pores of the high-build primer and provided an even smoother surface. A day later, a coat of guide dust was applied over the finish primer and block sanded at 320- grit. The few remaining pin holes, scratches, and small low spots were filled with a high-quality polyester glazing compound and spot primed with 442. The DeKup system made it easy to mix up small batches of paint.
BRING ON THE GLOSS
On the morning of spraying the top coat, while the mixed paint inducted (reacted), a final light hand sanding with 400-grit was followed by an air gun blow down, a two-rag wiping with Alexseal A9049 Wiping Solvent, and a wipe down with a tack cloth.
We selected Alexseal Top Coat 501 in Whisper Gray, a slightly gray white that seemed like the perfect mast color. Three coats produced a very glossy finish from the first coat up. A tiny bit of matched accelerator can be added to the paint to speed drying if dew is expected to form on the paint overnight or if you need a shorter time before masking tape can be applied.
I got a little overenthusiastic “flowing” the top coat, which resulted in a few runs on the mizzen mast and main boom. Just like snow on a roof (something we know a lot about in Colorado), the paint does not run right away. Instead, it builds up nicely and then seems to suddenly slide down the surface. After that, I got my spraying under control and the main mast turned out perfectly. The runs were later wet-sanded out with 1500 and 2000-grit Meguiars solid sanding blocks, followed by their Medium Cut compound and Ultra Finishing Polish on a handheld power buffer. This was my first experience with the reparability of the Alexseal paint system—you would never know the runs were ever there. After the rest of the boat is painted, I will return to the spars and remount all of the hardware.
EXCEEDING ALL EXPECTATIONS
With the combination of patient prep work, the easy-to-apply Alexseal paint system, great advice from Alexseal reps Tripp Nelson and Alex Sandas, a spray gun recommendation, and lots of sanding, I can attest to a super smooth, see-yourself reflective gloss finish that exceeds my wildest expectations. I can hardly wait to paint the deck and hull with the Alexseal paints and see our “new” boat.
BWS is following Pete and Jill Dubler’s refit and restoration of their Pearson 424, Regina Oceani. After more than 5000 offshore miles crewing for others, Pete selected the 424 for future cruising. It will take a few years, but Pete is committed to the belief that cruising should not be “repairing boats in exotic locations,” so she will be “sound and Bristol when she splashes.”