


Learn to splice your double braid lines (published April 2013)
Marlinspike seamanship is an often-overlooked aspect of sailing. Most cruising sailors know half-a-dozen knots that are applicable in various situations aboard their boats. But, not many sailors know how to splice an eye in double braid line.
Double braid is popular aboard cruising boats because it is long lasting, strong, has relatively low stretch and is inexpensive when compared to high-tech line. Take a look at your running rigging and you will see that double braid is used almost everywhere, from halyards and control lines to dock lines and sheets, and many of those lines have, or need, an eye splice. If you want to add double braid splicing to your bag of seamanship tricks, here is an easy-to-use tutorial to get the job done.
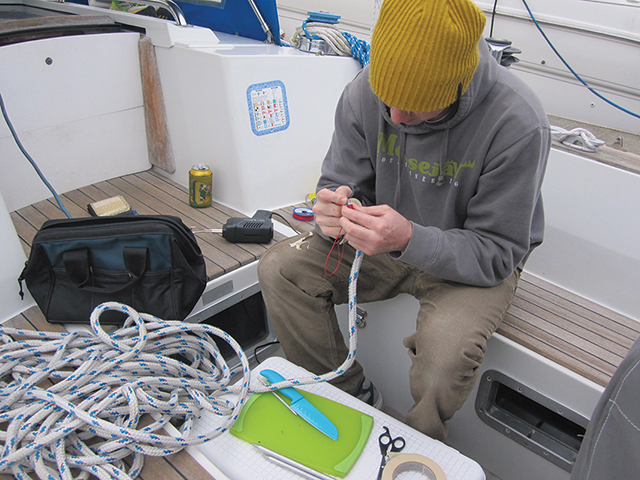
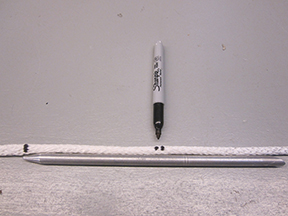
The essential tools for completing a double braid splice are: a length of new double braid line, a set of Samson Aluminum Tubular Splicing Fids (or similar), an awl or marlinspike, a sharp knife, cutting board, sharp scissors, masking or Marlow tape and a black Sharpie (silver if marking black line). Note: Do not splice used line; even if it has been wet and dry once, it will be very hard to work with.
When you set up to make the splice, tie a knot about six feet back from the bitter end of the line. It is a good idea to anchor the knot to something sturdy such as a cockpit cleat or sheet winch. A solid anchoring spot for the line will make the last steps of the splice easier. Lay out your line on a flat surface and choose one fid that is the same diameter as the line you will be splicing and one that is the next size smaller. Now you’re ready to splice.
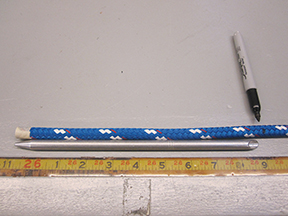

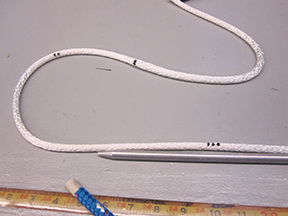
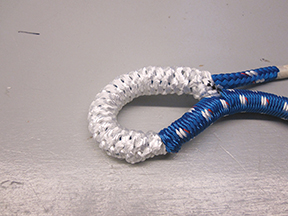
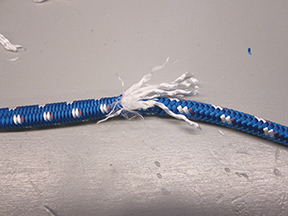
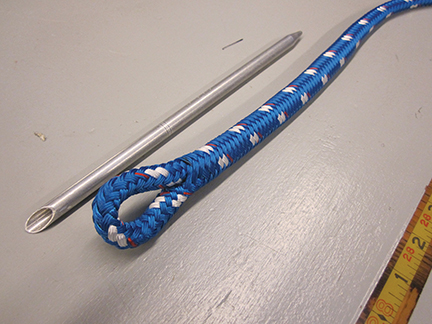
Step One: Marking the Cover (fig: 1,2)
Measuring and marking the cover and core is absolutely essential to getting your splice to work correctly. Using a fid that is the same diameter as the line, measure one fid length from the end of the line and make your first mark (Mark A). From Mark A, measure your desired eye size and make Mark B. Note: If you are attaching a shackle inside the eye, make the eye slightly larger than you think you’ll need. In most cases, the splice shouldn’t be tight against the hardware. From Mark B, measure one fid length down the line and make Mark C.

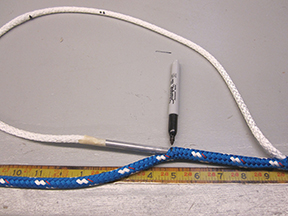
Step Two: Extract the Core (FIG: 3)
At Mark B, use your awl or marlinspike to retrieve the core from inside the cover. It helps to bend the line sharply to get started and be careful not to snag any strands of the cover as you remove the core.
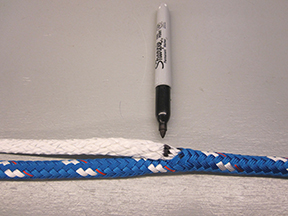
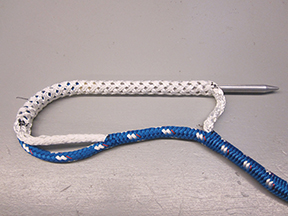
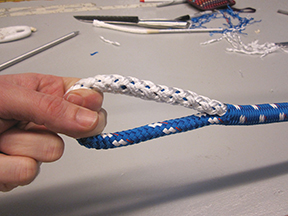
Step Three: Marking the Core (FIG: 4,5,6)
Once the core has been extracted, push the cover towards the knot and then milk the cover back towards the bitter end. This helps to separate the cover and core, which will make the remaining steps easier. Where the core exits the cover make Mark I.
Now push the cover back towards your knot to expose a few feet of the core. From Mark I, measure half-a-fid length and make Mark II. From Mark II, measure one fid length and a half and make Mark III.
Step Four:
Inserting the Core into the Cover (FIG: 7,8)
Now you are going to start the actual splice, which will seem a lot like a Chinese finger trap. Tape the end of the core, cut it at a 45-degree angle and tape it to a fid that is one size smaller than the diameter of the line. Try not to use too much tape as it will make the core harder to pass through the cover.

Insert the fid at Mark A and milk it down the line until the tip of the fid reaches Mark C. Remove the fid and that section of the core at Mark C. If you are installing hardware, pass the fid and core through the hardware before inserting the fid at Mark A. Note: Because the core is doubled up inside the cover between A and C, this part of the splice can be difficult. Take it slowly to ensure the fid does not detach from the core.
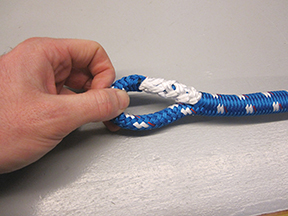
Step Five: Inserting the Cover Inside the Core (FIG: 9,10)
Tape the end of the cover and cut it off at a 45-degree angle, then tape the end to the fid that was used for measuring and marking.
Insert the fid into the core at Mark II and pull it out at Mark III. Now pull the cover tight against the core and visa versa. This is called a crossover and should be snug.
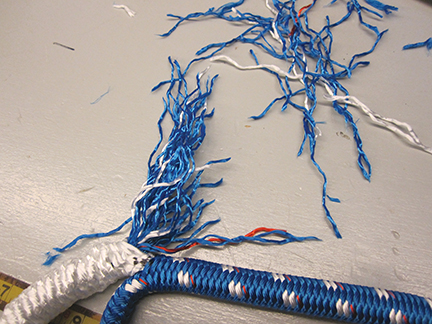
Step Six: TapeR and Bury the Cover and Core (FIG:11,12,13,14)
Pull the cover out of the core as much as possible, remove the tape and fid and splay out the cover about a half to one full fid length. Then use scissors or a knife to taper the splayed out strands. Once the cover has been tapered, milk the core over the tapered ends.
Now you are going to basically do the same thing with the cover coming out at Mark C. Pull the core through until the tapered ends of the cover inside the core just meet the crossover. Next, grab the core where it comes out at Mark C, pull the core out about a half a fid length or more and cut it at the spot where you initially grabbed.
Then, splay out the core strands and cut a taper into them. Once they are tapered, milk the cover over the tapered core. Note: Tapering is important. If not tapered well, the core will have an abrupt end to it inside the cover, which will create a weak spot in the line.
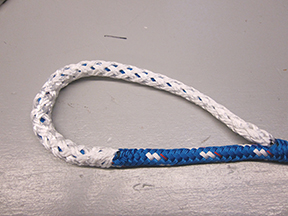
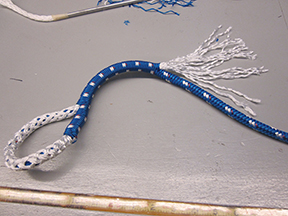
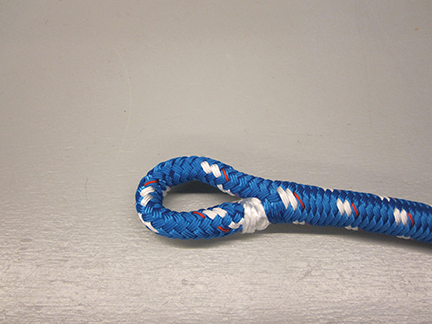
Step Seven: The Final Bury (FIG: 15,16,17,18)
The last step in the splice is to suck the core and tapered cover inside the line.
Make sure that your line is securely anchored and then pull back on the line. While keeping constant pressure on the splice, milk the cover from your anchoring point back towards the splice and over the core and tapered cover. Try to keep slack out of the cover that forms the eye. If you end up with a bit of core showing, put a bar or handle of a hammer through the loop and give it a couple swift tugs to snug up the splice. Don’t be afraid to use force. If the splice is done properly, the core will not, and should not, be visible.
A double braid splice certainly isn’t the easiest thing to get perfect on your first try, so don’t get frustrated. Buy some extra line and practice until you are satisfied with the result.
When you get the hang of it, you’ll be looking all over your boat for places to add a splice and trading the service with fellow cruisers. Plus, learning to splice your own running rigging is immensely satisfying and can save you a few dollars at the boat yard.