


Tips for anchor windlass installation (published June 2013)
I no longer need a mirror to see that time has finally caught up with me—let’s face it, I’m getting old. Having made this admission, high on our list of cruising equipment was a new 12-volt anchor windlass. As we sail shorthanded, my wife also needs to bring the anchor up without outside assistance, which proved quite a challenge for her with our old manual windlass. A new electric model would also encourage us to anchor in slightly deeper water than we do at present, an important consideration for many anchorages.
WHAT TO BUY?
The new windlass needed to lift the 45-pound anchor and length of chain from the bottom to the surface, plus the strain of the tide and wind being countered by the engine, so a fast retrieval was essential. We chose a vertical model with an additional capstan that will allow me to wind in a rope if I ever need to (there are many of these models to choose from). I did not need to lower the anchor electrically so this saved money and complexity—one solenoid instead of four. Another important feature is the ability to bring the anchor up manually if the power failed.
Just as important in choosing a good windlass is the choice of anchor chain, and ours needed replacing as it had worn links. While it worked on the manual windlass, it would not be safe under load with the electric model. I selected 70 meters of new chain and to be sure I took the chain gypsy to make sure it fit. This is really important as most new windlasses will only work with a certain size and type of chain. While I was at it, I went ahead and bought a new Manson supreme anchor and swivel. We never regretted this choice as it held when other boats dragged.
While there are different opinions on the best way to power an electric windlass, only one was acceptable to me. The electric motor is like an automobile starter motor. They take a lot of current, particularly under load and to get all of it to the windlass, you need thick cable. This is both expensive and heavy, so there is always the temptation to compromise, my advice—don’t. Keep the run as short and as heavy as possible. The run in my boat required nearly 20 meters of cable from the engine starting battery to the windlass solenoid and back again. At roughly $20 per meter, this was expensive, but if you are worried about these costs maybe you should sell the boat and take up a less pricey pursuit.
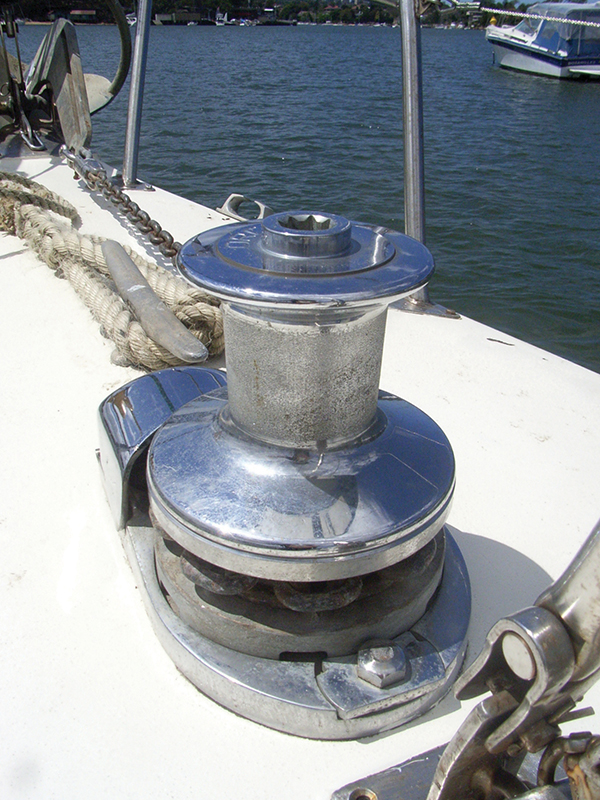
OUT WITH THE OLD
The first job was to get the old manual windlass off. Our old one had been on for around 30 years, but corrosion is no problem with a large spanner. The old chain had to come off too, which was easy as I simply put the dinghy under the bow and let it run out. We used our other dinghy to tow the loaded one as the combined weight of me plus the chain was well over my safety limit.
Naturally, none of the existing mounting holes aligned with those needed for the new windlass, so the originals were filled with epoxy (tape the bottom of the hole and pour in the epoxy). I aligned the center of the gypsy with the bow roller for a straight run for the chain. The challenge was the 100mm diameter hole for the drive shaft and a smaller one for the chain. With no hole-saw of the correct diameters and no electricity at the mooring for my jigsaw, I drilled a circle of adjoining 6mm holes with a battery drill and filed the edges smooth. This turned out neater than expected, even though it is under the body of the windlass and not readily available for scrutiny.
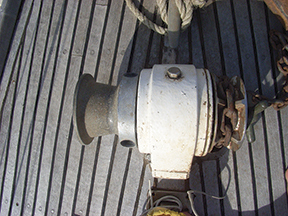
IN WITH THE NEW
Despite having had an anchor windlass in this location before, the deck was not strong enough for the new one so I glued a piece of hard wood in place between the two bulkheads. This significantly strengthened the base for the windlass and the main cleat. The windlass body was then mounted on a bed of Butyl tape to seal out water. This works well as it never quite sets, allows for slight movement and sticks to almost anything.
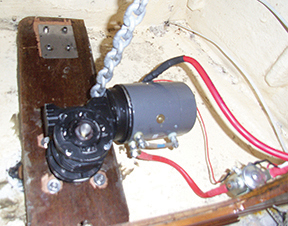
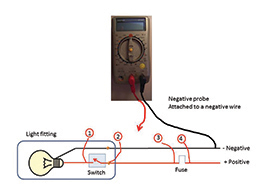
The next job was to get the wire from the engine battery to the windlass on the bow. I had two major bulkheads to drill as well as a number of panels. Conduit provided protection to the cable insulation, as a short circuit would be disastrous in this setup. I took the power from the engine start battery because we would never try to lift the anchor unless the engine was running and with the alternator output we have 14-volts available. And I used 000 AWG stranded cable so the voltage drop (less than 0.5 Volt) is acceptable.
The solenoid is mounted on the forward bulkhead close to the windlass motor with the foot switch on deck far enough from the chain for safety while the motor is running. I allowed for a remote switch in the cockpit, but have not got around to installing it yet, maybe another day. I used a 130A circuit breaker with a motor load-curve. An instant breaker could trip unnecessarily as the motor starts to haul the chain due to the high start current while under load.
I would recommend trying this project as it required average skills and is definitely within the ability of any practical handy man. The whole task took three days with most of the time spent running the cables and cutting the aperture for the gearbox and chain. It was well worth the effort as the addition of the new windlass has made retrieving our ground tackle considerably easier.
John Tylor is a retired electrical engineer who lives in the Blue Mountains west of Sydney, Australia. He and his wife Patsy cruise the east coast of Australia when they can, but he is currently upgrading their venerable Duncanson 35 yacht Ard Righ (‘The High King’ in the Celtic language). John has repaired the electrics on many yachts and gains inspiration from these experiences as well as from the many upgrades to his own boat.
WHAT WE BOUGHT
410kg (900 pound) lift Orca Hutton VE900 model made by the Australian Yacht Winch Company. They supplied as standard a Gypsy for the 6mm (¼ inch) short link chain, a Winch Handle, Deck Switch.
130 A circuit breaker, 70 Metres (230 feet) of Short link galvanised Grade L 6mm Chain, and 20 metres (66 feet) of 000 AWG electrical cable. We upgraded the old CQR copy for a new 20 kg (45 pound) Manson Supreme anchor.