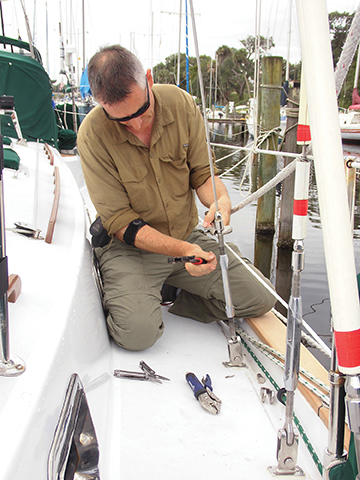
Over the last few years Jill, my wife, and I have read lots of stories of cruisers losing their rigs to one or another failure in the rigging. By taking the time and checking over all aspects of your rig, you can prevent failings (published November 2015)
Most of these rig disaster stories seemed to be caused by broken chainplates. The universe seemed to be talking to us as we personally encountered several folks who had chainplates break in just the last few years.
A little closer to home, Julian Crisp of Sparman USA spoke at our sailing club one evening. Earlier that day he did a rigging inspection for the club’s commodore, Joe Coleman. As Julian grabbed the main shrouds and shook them after tuning the rig one of the chainplates let go—right there at the dock! No foreboding seas and storm, just a good shake. It sounded like a rifle going off. Now the rig did not come down in this case, but Joe was white as a sheet and maybe a little seasick—right there at the dock. Of course, once the chainplate was in pieces, the below-deck crevice corrosion was obvious.
Julian showed us picture after picture of failed rigging that evening. He was truly the grim reaper of stainless steel. “No stainless steel is perfect, but 316 has been proven in test after test to have the best properties and life for cruising sailboats”, Julian told us. “But when it comes to rigging, tests also show that failures start happening at about 10 years. Going much beyond that is just tempting fate”.
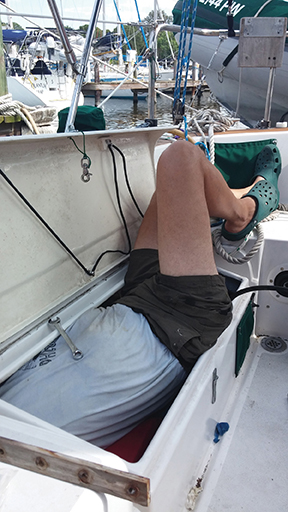
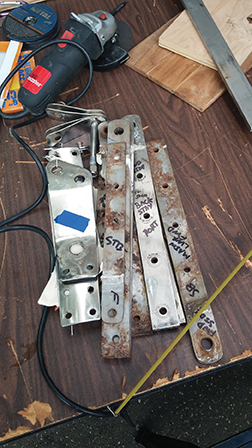
Lots of folks “replace their rigging” but that seems to just mean they replaced their wire and wire terminals. When it came time to replace our rigging, we considered every link in the chain that holds up the rigging. If chainplates can fail, what about the tangs (plates) that connect the rigging to the mast? That stainless is now 34 years old on our boat. Your boat may not use flat or curved plate tangs, instead it may have T-balls or other terminals going into sockets on the mast. How old is the metal of those sockets or retaining plates? When will you know the weakest link of your rigging? Hopefully not right after the rig comes down.
UP OR DOWN
The easiest way to re-rig a boat is with the stick down, in the yard, on saw horses. We had no taste for pulling our two masts now, but wondered why we didn’t do this while the boat was in pieces in Colorado. Doing the work in the air is not that difficult in reality and a bosun’s chair is not hard on the back of the person sitting in it.
First we measured each of the shrouds, pin to pin. Any intervening turnbuckles, toggles (in some cases multiple toggles in a row), or other hardware was ignored for the purpose of length measurement. I carried the tape measure aloft and Jill spotted the end of the tape on the clevis pins at deck level. While up there I also measured the diameter of the wire, the dimensions of each tang, and the diameter and length of each clevis pin with a digital caliper, calling down the name of the shroud and the measurements to Jill who wrote them in one of our ever-present spiral notebooks. We quickly found that 3/8 inch wire is not really .375 inches, and ¼ inch is not .250 inches. Get a close measurement and your rigging shop will tell you what the real size of your wire is.
Our rigging had Sta-Lok fittings at both ends of each wire. That’s nice. They are strong and can be reused with the replacement of the inner cone if they show no crevice corrosion or bluing (likely from nearby lightning strikes). We really had no idea how old these fitting were and some indeed showed lines of pitting. We elected to replace all fittings but going with Sta-Lok fittings top and bottom was too pricey so we decided to use swaged fittings at the top end of each wire and a new Sta-Lok at the bottom end. The top ends are much less likely to fail as water does not run down into the ends of the up-turned fittings.
We found some other ways to economize. For example, our main mast backstay splits into two at a delta plate to allow the stays to go around the mizzen mast. The prior rigging used a single plate with fork terminals on the end of eacth wire. By switching to using two plates straddling eye terminals, we saved over $150 without any compromise in the strength of the rigging.
WHAT WAS UP, MUST COME DOWN– BUT NOT ALL AT ONCE
Before we took down any of the rigging, we first secured all of the new wires, cut a little long, with swaged terminal on the top end, Sta-Lok fittings for the lower end, new turnbuckles with toggle ends, and all new clevis and cotter pins. We also secured various dimensions of raw 316L stainless plate or bar stock from OnlineMetals.com for making the tangs and chainplates, as well as new bolts and machine screws. With all this in hand, we were ready to take down almost half of the rigging.
On the first Saturday of this several weekend project, we took down the upper shrouds and their tangs from both masts as well as the main back stay, labeling each shroud as it was removed. Before loosening any of the turnbuckles, their current positions were marked with several turns of electrical tape where the threaded rod emerges from the turnbuckle and the portion of the thread within each turnbuckle was lubricated with Superlube—nothing can ruin your day like a galled and stuck turnbuckle. The main mast remained steadied fore and aft by the forestay, triadic to the mizzen mast and, in turn, by the mizzen running back stays. To provide more support opposing the weight of the furler and forestay, we tied a heavy line around the head of the main mast and ran it to a winch on the mizzen mast. Although Jill swore the rig would come down, especially as I climbed the masts, they were plenty steady without the load of sails pulling on them. We also pulled the respective chainplates.
CUTTING AND DRILLING IS EASY. REALLY!
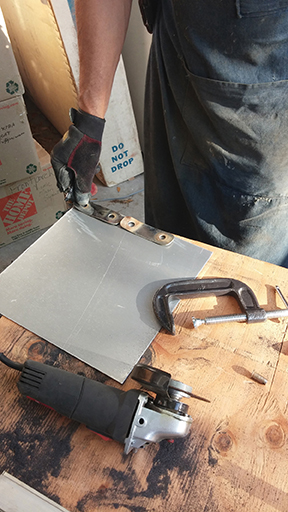
Don’t let anyone tell you that cutting and drilling stainless steel takes special tools and huge amounts of time. We cut out all of the tangs, regardless of their fancy shapes or thicknesses (up to 3/8 inch), using cheap cuttings disks (lots of them) on an angle grinder. The metal was clamped to a table and the cuts made a little proud of the lines traced from the old parts with a fine-line Sharpie marker. The edges were then cleaned up with a bench grinder and files and in some cases made perfectly straight on a small milling machine. Of course one should wear a face shield, dust respirator mask, vibration gloves, and ear protectors while using these tools not only providing protection but reducing operator fatigue.
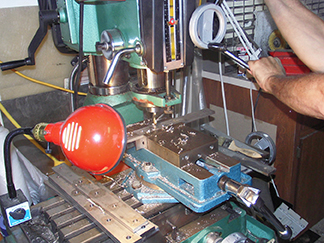
Drilling the 5/8 inch and 3/8 inch holes in the 3/8 inch thick chainplates is easier than you might think. We did not bother with cobalt drill bits or drilling a series of ever-larger holes. Instead we used a drill press (small mill actually) and turned the regular high speed steel drill bits very slowly. First each hole was spotted with a center drill. Next the full size hole was drilled. The bit was turned at less than 200 RPM and steady pressure and a little cutting oil was applied. This steady pressure is the key. Two nice curls of metal emerge from the bit and in less than a minute or so, the hole was complete and we moved on to the next one. Trying to drill stainless with a higher RPM can create too much heat which “work hardens” the stainless steel. Once that happens, it becomes nearly impossible to drill with ordinary tools. When it comes to stainless steel, slow and steady and you will win the drilling race.
Some of the tangs were dished to match the profile of the mast and most had bends. The bends were easy to make by holding the tang in a bench vice, with the jaws cushioned to keep from marking the stainless, and pounding a block of stainless against the tang with a large hammer. Using a block between the hammer and the metal protects the part from dings and provides a straighter and more predictable bend. I thought dishing of the larger tangs was going to be the hardest part of the project but holding the edges of each plate off the workbench on some blocks while pounding with a piece of pipe in the center created the graceful curves. The old plates were used as patterns for the new ones —bend a little, put the old and new plates together to compare them, and pound some more if needed.
POLISHING, SO MUCH POLISHING
Sanding and polishing the tangs and chainplates was the real labor of this project. Random orbital sanding starting at 80 grit and working down to 320 grit followed by buffing with emery and green polishing compound produced a scratch-free high polish shine. Electro polishing would provide a more passivated surface, but don’t be fooled, all of that hand polishing is not avoided by electro polishing. If you skip any of the steps, you just end up with a slightly shiny but still rough surface after paying dearly for electro polishing.
MAKING UP THE WIRES
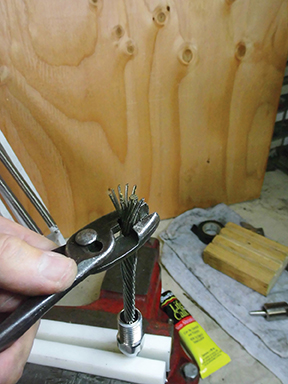
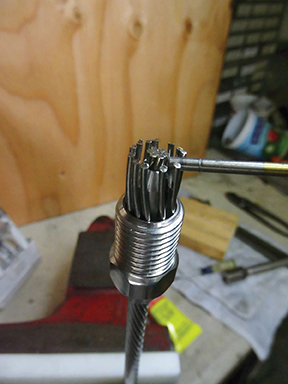
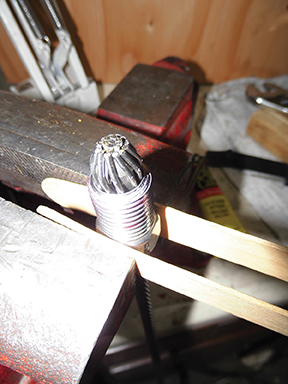
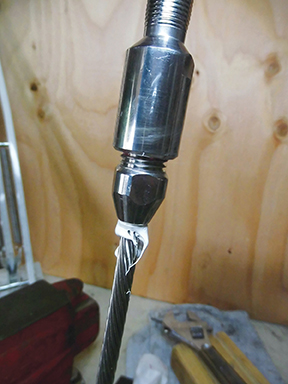
Each of the old shrouds was adjusted back to the pre-loosening turnbuckle position. They were laid out on the driveway with a large screwdriver vertically staking the top eye of the old and new shroud to the ground. The new turnbuckles were set almost all the way out, with maybe an inch of thread of each stud showing inside of the turnbuckle, and laid next to the old shroud with the bottom toggle pin hole even with the old shroud’s bottom pin hole. The new wire was then marked with a Sharpie marker even with the end of the two wrench flats of the Sta-Lok fitting. That end of the wire was moved over to a bench vice where the wire was sawn to length and the Sta-Lok stud fitting, removed from the turnbuckle, was installed. (see insert on installing Sta-Lok fittings).
WHAT COMES DOWN, MUST GO UP
Putting up the first round of shrouds and installing half of the chainplates was, while not hard, still a full day’s job. First the chainplates were bolted in place and bedded with fast setting 4200 in two layers—one up to the level of the deck and then a second taking the level of the sealant about 1/8 inch higher than the deck. This keeps water flowing around the caulk and now standing atop it. Masking tape, some WD-40 (never acetone), and paper towels made for a neat and quick job.
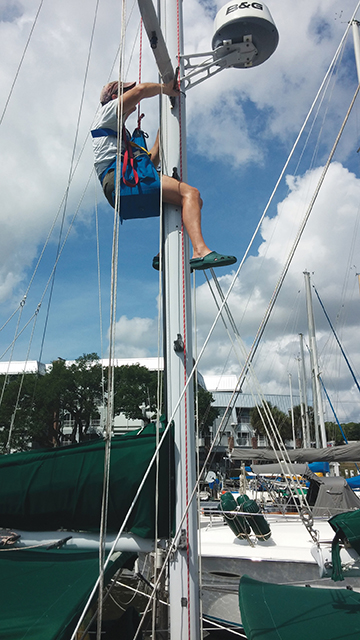
The work aloft was simplified by first assembling the tangs and clevis pins on deck and lifting each shroud as a “ready-to-bolt on” unit. Since we have steps on our masts, Jill’s job of hauling the bosun’s chair was supposed to be simplified to tailing the line to keep the seat on my butt while I climbed and then securing the halyard once I reached a working position. In reality though, since the shrouds were tied to the halyard as well, the higher up I and the shrouds went, the more weight Jill was lifting with the winch. Of course all new screws or bolts were used and each threaded hole was prepared with Tufgel to protect against electrolysis between the aluminum mast and the stainless hardware. Remember that heavy line between the main mast head and the mizzen winch? That turned out to be needed to pull the main mast back against the weight of the headsail furler before the backstays could be fastened to their chainplates. Don’t forget to lubricate the turnbuckle studs well with Superlube or Lanocote to keep the threads from galling.
The next set of shrouds, with their tangs and chainplates, to be replaced were the uppers and the triadic. Finally, the forestay was replaced after all the other new rigging was in place. The spinnaker halyard was secured to the anchor platform to hold the main mast forward before the headstay and the furler was lowered using the genoa halyard. The stem fitting, which connects the forestay to the bow, is at least as important as any chainplate. We had a new one fabricated by the folks at Garhauer before the boat left Colorado. The old one had some very scary cracks in it, worthy of Julian Crisp’s hall of fame.
TUNING THE RIG
To tune the rig, we started at the bottom. The rig was stood up straight using the lower shrouds. Next the top shrouds were tensioned while maintaining the column of the mast. Our forestay has a fixed length. The backstay was then adjusted to introduce the mild rake to the mast and the triadic slightly firmed up to keep the mizzen from falling backwards. A few weeks later, we had Julian check our work and as it turned out, we had the rig still too loose. Julian can also see straighter on a rocking boat than either Jill or I, but that comes from his decades of experience no doubt. He also recommended we give every turnbuckle another half turn after several days of hard sailing. It is worth mentioning also that there is a right and a wrong way to tighten a turnbuckle. The top stud should be held with a well-fitting open-end wrench and the turnbuckle turned with an adjustable wrench that spans the full breadth of the turnbuckle at its center web. Using a screwdriver or rod stuck through the turnbuckle should be avoided as this can put dents and stress points in the turnbuckle body.
Jill and I sleep better at night, first from the exhaustion of all this work, but finally from knowing that every link in the chain of keeping our rig up is ship shape and ready for many years of sailing to come.
For over a decade now, Pete Dubler has been writing for BWS about projects on his Pearson 424 including articles in this series detailing her complete restoration and refit. During 2015, under a phased retirement program, Pete and his wife Jill will spend more time shaking out S/V Regina Oceani and plan to depart for worldwide cruising December 2015.
COTTER PINS
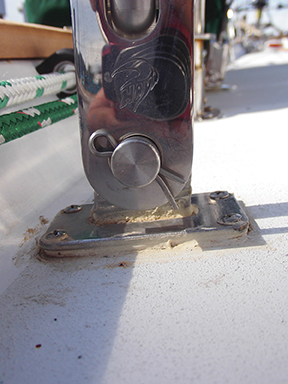
Cotter pins don’t hold up your rig. They just keep the clevis pins, which do hold up your rig, from coming out of their holes. All the cotter pin has to do is stay in its hole in the clevis pin to keep the clevis pin from sliding sideways or popping up and out. Don’t go all crazy bending the cotter pin legs into fancy curlicues. If your rig were to come down, you would want to get it clear of your boat as quickly as possible. Cotter pins should not slow that process down by being overbent or wrapped around the clevis pin. Just spread the legs of the cotter pin enough, 15 to 20 degrees is plenty, to keep the pin being able to slide back through the hole in the clevis pin on its own. You should be able to remove all cotter pins with just a quick pull with a pair of pliers. No unbending should be required.
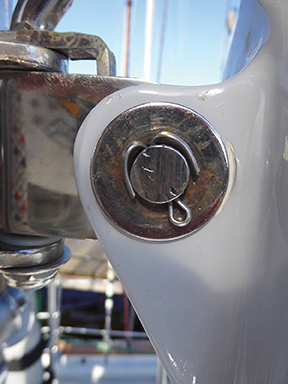
Inside a turnbuckle, instead of cotter pins, try a length of stainless steel welding rod run between the two studs and bent over so the ends of the rod point towards each other. This leaves nothing to snag sails, lines, or legs. You can remove this with your fingers by bending the tails upward to horizontal and pulling the whole rod out from the other side. Turnbuckles just don’t spin wildly around, but they can creep open over time. This simple method secures them from turning, is easy to install, and to remove.
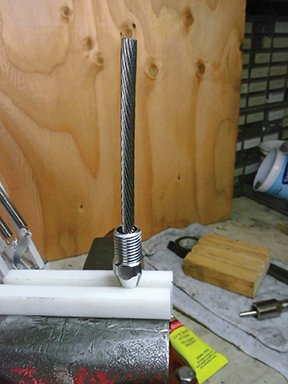
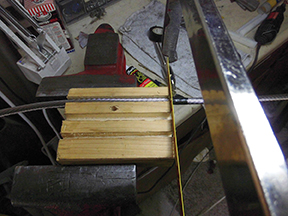
A Wire, first wrapped with electrical tape, is cut to length squarely with a 32 tooth/inch hacksaw blade while held in a wooden block grooved so the wire fits snugly.
