


Heading to the tropical reef systems of the world is the driving reason for many cruisers. However, when we get among the reef systems of the cruising world we can no longer rely solely on electronics and the safety of the boat now relies on our reef piloting skills. (published January 2016)
OVERVIEW OF REEFS
Once you get among the reefs, the safety of electronic modern navigation fades away and reef piloting takes over. The rules for reef piloting are plain and simple. Use your eyes to drive your boat around the shallow and crunchy spots while traveling among reefs. Basic dead reckoning is still taught in navigation classes, but the reality of cruising is that GPS and chartplotters rule. For me, that’s all for the better. I love knowing exactly where I am at any instance on a reliable and highly accurate chart.
Most North American cruisers get their first taste of sailing among reefs either in the Bahamas, the San Blas islands of Panama or the Tuamotus of French Polynesia. The quality of electronic charts available for all these locations has increased dramatically over the last few decades. Even with the improved charts these areas all require reef piloting skills to navigate safely. The Explorer charts for the Bahamas (paper and on some electronic copies) are very complete. But the nature of the banks and cuts in the area means that sand bars and narrow cuts change seasonally and after storms. In addition, you are often navigating in areas where there may be less than a foot or two below your keel.
The work and stress level of the San Blas islands navigator has been greatly eased by the charts now available in Eric Bauhaus’s The Panama Cruising Guide and the reef systems, although extensive, don’t change much year to year. Nevertheless, the area is the home of half a dozen or more cruising boats going on the reefs each year, many a total loss. The Tuamotu atolls of French Polynesia were referred to by the old navigators as the Dangerous Archipelago up to the last century. The French charts for the area (available on electronic charts such as C-Map) are very carefully produced. They will typically cover in detail the entrance pass and the area inside the pass up to the town or pier. Beyond that the hundreds of square miles of area inside the lagoon require eyeball navigation.
Basic and advanced navigation can be taught in classes and via books or online. You have to, of course, get out and use it to really master the intricacies and time demands that onboard navigation requires. Reef piloting, being much more of a moment by moment decision based on updated eyeball information requires some on-the-job training or, as it turns out for some, a trial-by-fire. There are a few basics and hints that can help you with your on-the-job training skills.
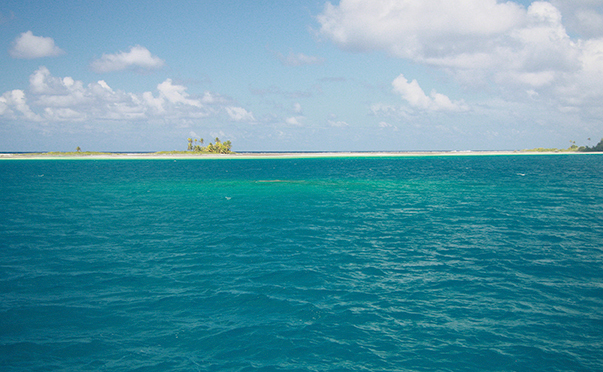
The coral reefs of the world fortunately occur in clear water, as coral requires lots of sunlight to prosper. The coral that we see in the tropics are typically in water inches deep to 60 or 80 feet. The growth of the reef systems and their current extent makes for fascinating study and undoubtedly many a PhD dissertation. Within French Polynesia, the island groups show drastically different stages of reef life. The story of these reefs is the story of volcanic islands sinking into the depths. The Marquesas group (including Hiva Oa, Fatu Hiva and Nuka Hiva) are relatively young volcanic islands that are steep-to on their sides. Depths of hundreds of feet occur within a few hundred feet or less of shore. There are small, fairly inconsequential coral reefs attached directly to the shore side depths. However, the island groups west of the Marquesas, the Societies and Tuamotus, have reef systems of high consequence to the cruiser.
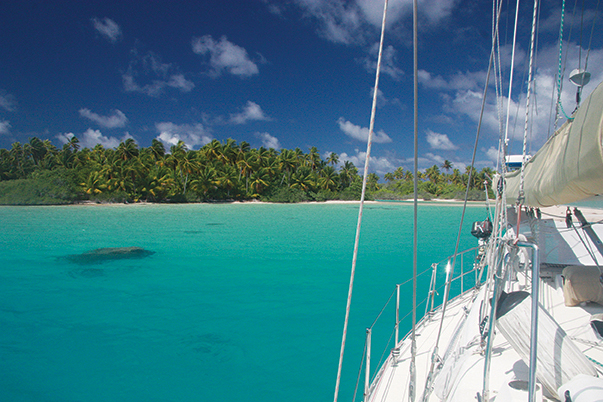
The Society Islands, like Bora Bora and Tahiti, are older. These are high islands, similar to the Marquesas that have slowly sunk. As the island sinks the reefs that were attached to their sides continue to grow and build up, keeping the upper parts near the surface and good light. This results in there being a fully protected and mostly navigable lagoon between the outer reef system and the land side. These lagoons are mostly deep, 100 feet or more, but are strewn with smaller reef areas.
The Tuamotu Archipelago are the oldest islands, the ‘mountain’ has sunk completely underwater, leaving only the outer reef system in place, creating a classic atoll. These atolls are a combination of reefs and small islets known as motus, many with navigable passes. The area inside the atoll, the lagoon, can be very large, some reaching 40 miles across. The lagoons typically consist of mostly navigable areas with 60 to 80 feet, or more, of water depth interrupted by small, very shallow, unmarked reef areas, which may be as deep as six feet or go all the way to the surface.
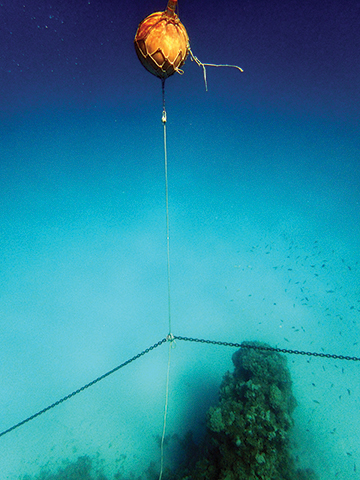
In the shallower waters of both types of lagoon, where you typically try to anchor, individual coral heads, known as bommies are common. Careful piloting to an anchor spot, choosing a sandy spot to drop the anchor and sometimes even the use of floats along the anchor chain (see sidebar page 33) will help to lessen the risk of wrapping the chain around a bommie and damaging the reef. Below are some hints that will hopefully make your on-the-job reef pilot training go faster and safer.
LIGHT
The most important thing to have on your side while reef piloting is light. The water depths can easily be read by looking at the color of the water. As the shades change from dark blue to bright and light blue, the depths are going from deep to shallow. If you want a good memento of your trip to the tropics, bring along a dozen small, clear glass bottles with caps and capture the different colored water to take home and show your friends. OK, not really. But the thought does emphasize how the water color is totally dependent on the light available. What you optimally want is to traverse the area requiring reef piloting between 10 a.m. and 2 p.m. This keeps the sun high in the sky and the glare down. Once you know an area you might push these times a bit, but the sun high in the sky is critical. Secondly, you want to schedule no clouds moving across the sun and no rain squalls while you are reef piloting. You also want the sun over your shoulder as much as possible. Let’s also throw in a rising tide, so if you do go aground the tide will help lift you off. If you are entering a pass between reefs, then let’s also time it for slack current. Obviously you just can’t schedule all these items to coincide at one time. Experienced piloting will help you decide which items are keys for the area you are cruising. In any case, good light is always the first requirement.
VANTAGE POINT
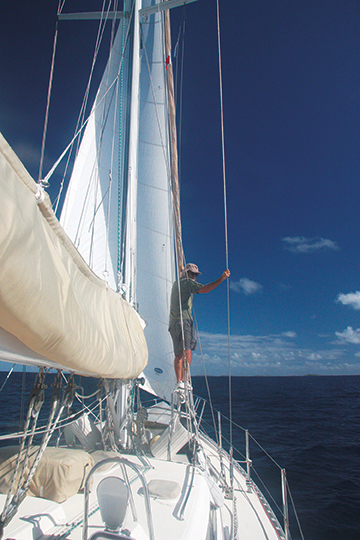
Reading the waters requires a good vantage point for your eyes. Some boats, particularly in the past, have mast steps all the way to the mast head. I’m not personally a big fan of putting hundreds of holes in my mast and adding mast weight and windage. Steps to the first spreader can be useful for getting a good angle for the look out. If you are going up the steps, make sure that you have a direct view of the helmsman, i.e. no biminis or dodgers blocking your ability to communicate with the helmsman. Shouting is not a reasonable option. If my boat did not already have mast steps (which it doesn’t), I would not add them just for reef piloting. Most boats have reasonable locations where piloting can be done from a decent vantage. On our boat I usually stand on the mast rails, aka chicken rails, which are on either side of the mast base. I stand on the one that has best view at the time. Alternately, many lookouts use the bow pulpit to get high enough to see well.
COMMUNICATION
Make a plan between the lookout and the helmsman about how you will communicate. The lookout should point in the direction they need the boat to go, not in the direction of the danger. Miscommunication on this simple rule can quickly lead to disaster.
LESS THAN OPTIMAL CONDITIONS
If the light deteriorates while you are piloting among the reefs, there are options that can reduce the risks. First of all, slow down. Hitting a reef at one and a half knots is lot less traumatic that hitting it at six knots. If a rain squall is passing over, consider dropping an anchor and waiting it out. You don’t need a perfect spot, even an open, 80 feet deep location is good for a 20 minute squall. If clouds pass over the sun, making reading the waters impossible or too risky, then stop the boat and stand in place till the heavens clear.
Sometimes it takes longer than you expect to get to your location, or perhaps due to conditions you decide to change your location. One day we were crossing the lagoon in Tahanea, an atoll in the Tuamotus. After sitting out at anchor some enhanced tradewinds on the eastern shore of the inner lagoon formed. After leaving our anchorage in the morning and getting into the center, we quickly realized that the enhanced tradewinds were not over yet and we needed to find another anchorage on the eastern side for protection. Turning back toward the east meant the sun was now in our eyes, making it impossible to see the scattered reefs. In this area there were not that many reefs, but they are all shallow and hard enough to do serious damage. They come straight out of the deep water with no depth warning. To make it to our new destination safely we tacked the sun. First traveling with the sun on the starboard bow side, letting us see ahead of us. Then tacking and bringing the sun to the port side, letting us get closer to our desired course. A few tacks and four or five course deviations for reefs and we were safely anchored in the lee of an eastern motu.
KNOW YOUR REEF TYPE
In some reef systems, the depths gradually come up from the deep, often in areas with large sand banks. In these cases keeping a watch on the depth sounder can give early warning of trouble ahead. This is the exception, not the rule. In most cases the reefs themselves are steep-to, and go from deep water to shallow in a matter of feet leaving the depth sounder to let you know you are aground after you’ve already made contact with the crunchy stuff. In a Tuamotu atoll a shallow reef will drop off into water 50 to 100 feet deep in less than a dozen feet. Forward Looking Sonar (FLS) can be a help while reef piloting. These units are basically depth sounders that look a few boat lengths ahead of the boat. They are most useful when going very slow and poking around a potential anchorage.
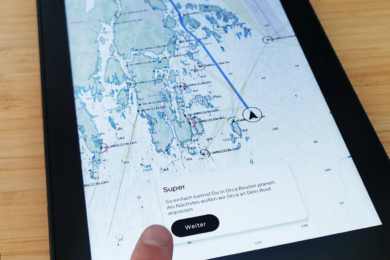
USING YOUR CHARTPLOTTER
This brings us to the old reef pilot saying: “A miss is as good as a mile.” You don’t need to travel far off your course to miss reefs. In areas where they come out of deep water, turning the boat to miss them by half a boat length is often adequate. The converse of this is that using your own or someone else’s previous track on a chartplotter can be dangerous. If you missed a reef by 10 feet on your way in and you travel along your bread-crumb track on the chartplotter on your way out, will your steering, the GPS signal and the chartplotter update rate still keep you 10 feet off the reef?
PROTECTION FROM THE ELEMENTS
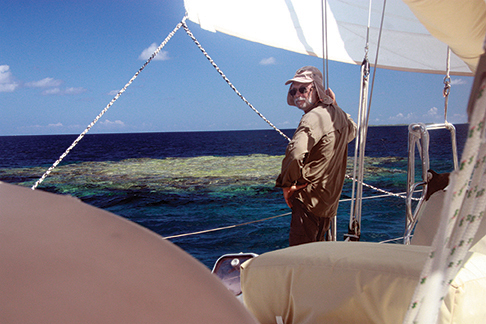
Wear good, protective clothing while being a reef pilot lookout. It can easily take three or four hours to cross a reef strewn lagoon. The lookout is going to be in open midday sun, with no bimini protection. Color coordinated garments—for the photo ops—should include long sleeve shirts, wide brim or safari style hats and, most important, good quality polarized sunglasses that are not smeared with sunscreen. If you wear glasses regularly, I suggest prescription, polarized glasses rather than snap-on covers. This reduces the number of surfaces that need to be kept clean. Bring a bottle of water with you to your lookout station so you don’t have to leave your post to go to the cabin.
WATER COLOR
With experience (and clean sunglasses) you will start to recognize the subtle differences between water colors much earlier and be able to make piloting decisions long before you are close to the objects you want to avoid. When the wind is calm and the sun high, water color is your talisman. Dark is deep, light is shallow. As the water starts to get shallower, the type of bottom affects the water more. If the reef has small areas of sand around it then it will stand out like a light blue sore thumb. If there is no sand, the water will remain dark and can easily be confused with deep waters. Their main difference is that the dark blue has a brown tint to it. Sometimes this tint can be subtle so make sure the lookout is remaining diligent and alert.
WIND AND CURRENT
As the wind increases you may be able to see subtle changes in the water surface near the reefs. These can often be seen from far away and make the reef a little more obvious. As the wind continues to pick up and white caps start marching across the lagoons they can start to obscure the reefs. Often, even in these conditions, you can see wave patterns that differ as they approach and cross the reefs. Increased current will also often leave telltale surface patterns around the reef areas.
MOTORING VS. SAILING
If you are only going a short distance in uncharted, reef strewn areas, such as from deeper water into a nearby anchorage, then it is clearly safer to motor in. When traveling long distances within lagoons there’s a joy in doing it under sail. If you have a choice, use a head sail that when set for the point of sail will have its clew fairly high. This makes it easier for the lookout and helmsman to keep a watch around the sail.
MORE ON REEF PILOTING
When piloting around reefs, you are often entering or exiting passes to or from the lagoon or shallow areas and the deep ocean waters. In some areas, like the Bahamas, the large banks fill and empty through passes on the tides. Their timing is well known and can be generally counted on when using tide tables. The actual wind and sea state at the time of passage will determine whether the currents will be something to benignly motor against (or with) or should best be postponed to avoid it becoming a life threatening maelstrom.
In the Tuamotus the passes have to fill and empty the tidal waters that fill the lagoons. Many large atolls only have one or two passes to process the water for tens of square miles of lagoon. These pass currents are nominally tidal. In other words, you’d expect some time near or just pass high tide that the current would start to go out and some time near low tide the current would start coming in. The atolls have very low shores and surrounding reefs. The ocean waves break over these reefs continually dumping tons of water into them. So in practice there is a lot more water going into the lagoons than just what is due to tidal influence. This means that the length of time and speed for the outgoing current is typically much longer and greater than the length of the incoming current. With the degenerate case being the current is always flowing out of the pass, only at differing speeds.
Every new batch of South Pacific cruisers frets about getting to the pass at slack water. In practice the passes are much more flexible. If you have a boat with a strong engine, then you can go into a pass that is flowing out at an average four knots. This pass may have some sections that you have to pass through that are hitting six knots, but these will probably be short in duration. The current is usually stronger in the center channel and lightens on the edges. Most of the passes offer a good view from outside. This means that you can see if there are standing waves on the outside or the inside of the pass. If so, it is time to wait for better conditions if this is your first time in this pass.
Passes on the west sides of the French Polynesian atolls are typically more protected from the prevailing winds and seas, making passage in and out easier. This holds as long as the out going current does not get too strong to enter, caused by big seas coming over the south and east sides of the atoll. As mentioned earlier, the passes and the initial lagoon areas just inside the passes are often charted accurately. It is always good to have scoped out a spot in advance just inside the pass within this charted area to anchor if you are forced to delay your entrance due to pass conditions and don’t have the light needed to safely traverse the lagoon to a more preferred anchorage. You should always be willing to pass up an atoll and move onto to a safer pass, even if it means another overnight passage, if the pass looks unsafe.
The tropical reefs of the world are the bread and butter of many cruisers dreams. Piloting through complex reefs to remote anchorages with world class diving off your boat is what keeps many of us going. Your reef piloting skills are your ticket to these anchorages.
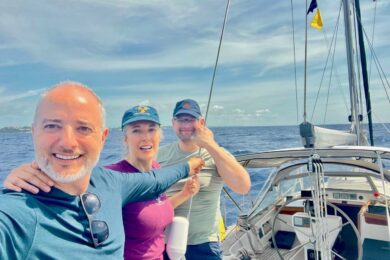
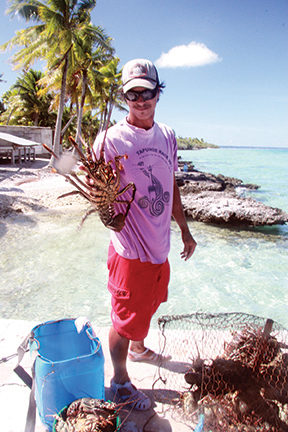
Paul Lever and Chris Hunter have been cruising full-time for the past four years. Their Outbound 44, Georgia, is currently in French Polynesia after another successful Canal transit and a visit to the Galapagos. Follow their adventures at svjeorgia.blogspot.com.
ANCHORING & CORAL REEFS
Whenever possible, you want to anchor outside of coral reefs to protect them. Anchors and chain do serious damage to reef systems. Unfortunately the Tuamotus atolls require that you anchor among the coral heads, there just isn’t anywhere else to anchor. The trick is to drop the anchor in a sandy patch and then float your anchor chain. This minimizes the damage to the corals while also reducing the chances of getting your chain hopelessly wound around coral heads. It is easy to find plastic floats used in the pearl farms on most any atoll beach. We tie the float close to the chain about 25 feet from the anchor and sometimes add another float 25-40 feet further along the chain. As you can see in the photo this keeps the chain just high enough to stay above the major heads.