


The joy of replacing outdated ports (published August 2012)

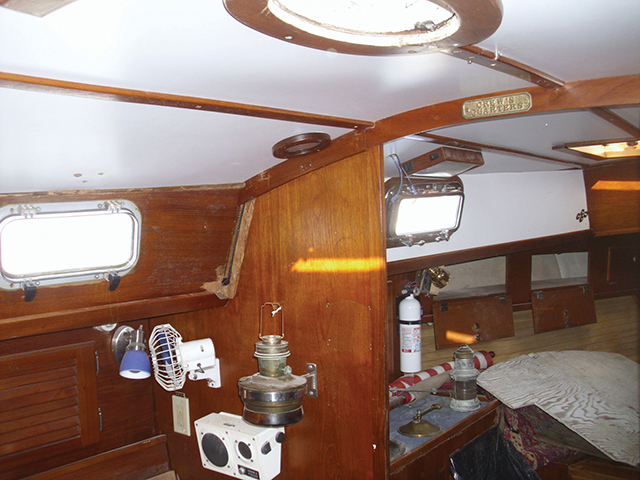
With the decks painted, more and more things on Regina Oceani, our Pearson 424 ketch, look tired or dated. The plastic and aluminum ports, with plastic lenses that seem to need to be replaced every few years, just had to go. Our “must” criteria for the new ports seemed simple: They should be blue water ready (after all, this is Blue Water Sailing magazine), meaning stainless steel, tempered glass, and simple-to-use, positive latching dogs. On the “wants” list were ports that drained such that when they were opened, accumulated water did not dump into the boat. Of course the new ports had to be similar in shape and equal to or slightly larger in size than our current ports. We had six 5”x12” and four 4” x 20” ports to replace, so the total budget would also be a consideration
HARD TO FIND ALTERNATIVES
Surveying the world for aftermarket ports to meet our criteria yielded surprisingly few alternatives. While we could find some stainless ports from respected brands such as Vetus, Lewmar and BSI, none of them met all of our “must” criteria. Most had acrylic lenses, and although I am getting pretty good at replacing lenses, I’ve had enough practice, thank you very much. Also, having seen any number of broken plastic dogs (latches) on boats I have delivered and having a few plastic hinge brackets break on our boat, stainless dogs and hinges are all I now believe can be depended upon.
This quest led us to only one manufacturer who could meet our needs: New Found Metals of Port Townsend, Washington (www.newfoundmetals.com). The company specializes in portlights—designing them, having them manufactured in China, and directly importing them. The ports have EPDM gaskets that are warrantied for 10 years. The hinges and dogs are fully adjustable so they can be pulled tighter as needed over time or set wider if screens, which have thicker seals, are inserted. And they are solid—any one of the new ports weighed more than all 10 of the removed ports combined!
For the most common sizes, 3” x 10” through 6” x 15”, the prices are all very digestible. When we jumped to the 6” x 20” ports, the price more than doubled. I asked Teri at New Found why this was the case. She explained that the larger port frames are not cast as single pieces. Rather, they are built up from separate pieces and welded together. As well, the glass in these larger ports is significantly thicker and there are twice as many dogs on each port.
ORDERING THE RIGHT PARTS
The ports are manufactured with spigots (the part of the inner frame that pokes through the side of the boat) of different lengths, with 1 ½” being the shortest. To determine which length of spigot is appropriate for your boat, a video on the New Found Metals website demonstrates how to measure wall thickness without removing a port. For boats with fairly thin cabin topsides, as is the case with our Pearson, a teak spacer must be added on the inside of the cabin. New Found also provides precise length screws in 3 to 5mm increments for each port.
OUT WITH THE OLD, CUT FOR THE NEW
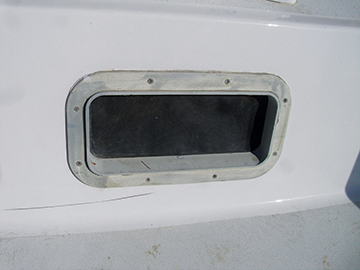
Working at first on only one or two ports at a time, the old ports were surprisingly easy to remove—take out the screws, pry off the trim rings, cut out the caulking with a utility knife, and pull the ports into the cabin. In retrospect, I wish I had removed the outer trim rings prior to painting the boat to provide more margin of paint under the new trim rings, but the appearance is still quite acceptable as the new ports are intentionally designed with slightly wider trim rings.

CUT AND DRILL
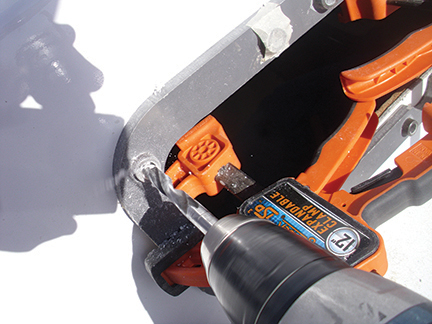
New Found provides templates for rent and I could not imagine installing the ports without them. The template is clamped in place and the through-holes are drilled with a 3/8” bit with steel guides providing precise positioning and alignment. One word of caution—the templates may have more drill guides than your port requires. I placed some masking tape over the drill guides that would not be used.
While still in place, the inside of the template is used to guide a pencil line for the cut out. With the template removed, some masking tape around the hole protected the new paint from any potential damage from the base of the sabre saw used to cut out any overhanging fiberglass and plywood. The hole was finished off with a 2” sanding drum on a RotoZip tool. The threaded flanges of the new trim rings set into 5/8” diameter, 1/2” deep holes. This could be formed using a countersink bit with a guide sold by New Found. Since our cabin side was so thin, the 3/8” holes were just drilled up to 5/8” all the way through.
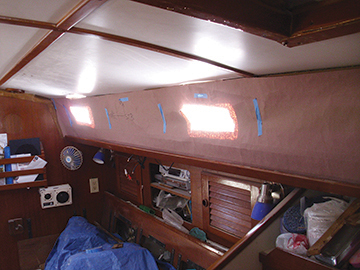
With the new hole cut to size, I made a paper template cut to guide the sizing of some white Formica laminate. This would brighten up the inside cabintop compared to the dark teak plywood, which was water-stained in several places. Contact cement was used to adhere the laminate to the plywood. At this point, the holes in the side ended up covered by the laminate. To open things up again, starting with a 3/8” drilled hole, a laminate trim bit in the RotoZip precisely removed the laminate to match the outer hole. A garbage bag taped to the inside of the cabin wall caught the mess.
Prior to a final dry fitting of the ports, I stuck the teak spacer rings, which I had already varnished, to the inside of the cabin wall with some double-stick tape. This held them in place until the ports were bolted down. To avoid cracking the laminate, I carefully drilled the bolt holes through with a 5/8” Forstner bit from the inside, using the teak spacer ring as a guide. Again, note that the spacer may have more holes than necessary for your ports.
DOING THE BUTYL MASH
To seal the ports, 3/8” round butyl tape can be wrapped around the spigot from the inner flange all the way out to the thickness of the spacer plus the cabin side. This means a lot of wraps and a lot of mashing of the butyl to an appropriate thickness—just a bit thicker than the gap spigot and the cabin wall. Too thick and the port just won’t squeeze through the wall; too thin, no seal. This exercise is best done in the cabin, sitting on the settee out of the sun, with the port in your lap.
Clamps are used to slowly and evenly press the port through the cabin wall, compressing the butyl tape. Don’t scrimp on cheap clamps; a good bit of force has to be applied here. Invest in a half dozen 6” or 12” Irwin or Jorgensen “quick clamps” with padded grips and non-slipping action. You will also enjoy having these on board later. Once the port is flush to the inside of the cabin (or spacer), more butyl tape is used to fill any remaining gaps from the outside. Expect to press a bunch of this tape around the spigot drains.
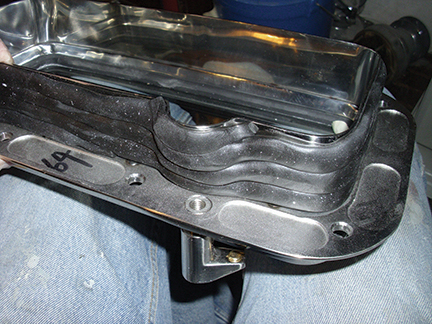
The outer trim rings and individual ports have numbers on the inside of their flanges to indicate that they are matched sets. These fit very precisely, so be sure you do not mix them up. When installing more than one at a time, I wrote the position of the trim ring on the inside of its flange just to be safe. The flanges are prepared with a ring of butyl tape on the inside diameter and a ring of foam tape on the outside diameter. Here again, clamps—not screws—are used to press the flange into place. All the screws were set and any excess butyl was trimmed from around the spigot with fingernails. Lastly, screws were removed one at a time, their holes filled with silicon sealer, and replaced before loosening the next screw.
 TRIMMED OUT AND LOOKING BRISTOL
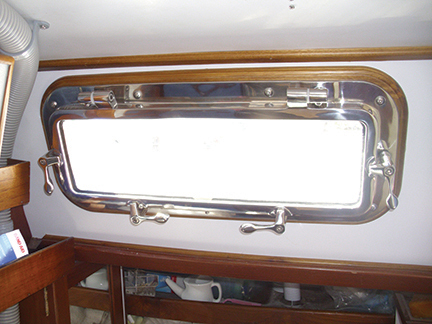
To complete the job, the Formica inside the cabin was trimmed out with new teak moldings shaped on the router table in my shop and varnished prior to installation. A bit of adhesive caulk and an air brad nailer attached the trim through the laminate and into the backing plywood. The amount of light now coming into the boat is stunning, and the overall brightness provided by the clear ports, shiny stainless and white laminate really cheers up the cabin. Hard to say for sure if it’s at the top, but adding the new ports is definitely one of the best improvements we have made to The Queen so far.
BWS is following Pete and Jill Dubler’s refit and restoration of their Pearson 424, Regina Oceani, on the hard in Fort Collins, Colorado. Pete emphasizes that doing the work yourself creates intimacy and familiarity with her systems and a special pride in your boat that writing checks just can’t offer.