


A cautionary tale (published October 2012)
In the year 2000, when Island Packet built my precious IP 380, MoDachaidh, apparently modern technology hadn’t yet perfected the “guaranteed impermeable” sanitation hose. Instead, Mo’ came equipped with a permeable rubber hose that began to lend the unmistakable aroma of “eau de sewer” to my boat at about the age of five or six. Each year, the odor problem grew worse.
Early in the process, I asked a very good boatyard in the Chesapeake Bay what it would cost to replace the sanitation hoses with the new, non-stinking sort and they quoted me $5,000. Hmmm…I guess it didn’t smell that bad, after all. Time went on and I got fairly skilled at putting off the inevitable. For the past five years, I have implemented many methods to minimize the smell—scrubbing the exterior of the hoses with Spic n’ Span, spraying them with Febreze, draping dryer sheets over them (the area below my forward cabin sole looked like a mini Chinese laundry), and always, always keeping the hatches open so fresh sea breezes would whisk away the offending sewer smell. But I wasn’t truly delighted with any of the results and I knew I would have to do something to permanently fix the problem.
 This fall, when I returned to Mo’ after a protracted absence, I realized that I simply couldn’t deal with the odor any longer. I decided that perhaps the DIY approach would better fit my budget—if not my skill set and physical abilities. Internet research told me that there were a couple of viable alternatives for the hose material itself. Island Packet’s customer service both confirmed my research findings and provided me with the exact lengths of the Trident Sani-Shield Sanitation Hose #101 (some were 1.5” ID, some were 1” ID and some were 5⁄8” ID). IP also quoted me the best prices on the hose itself, since it is now what they use as original equipment. I have to give credit where it is due: Island Packet really listens to their owners, many of whom live aboard their boats, and they are constantly improving their product accordingly.
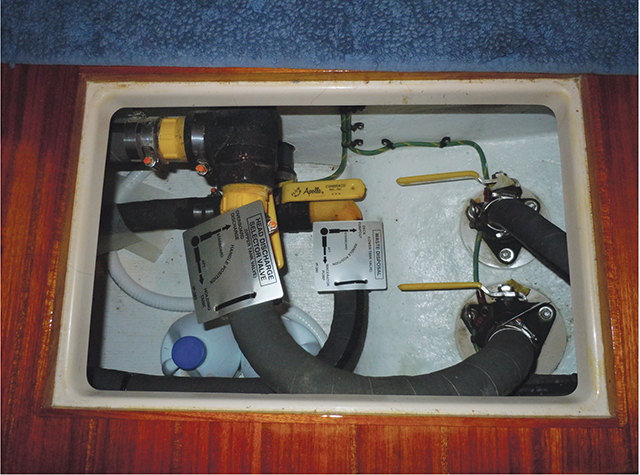
I studied the layout and found it complicated. The hoses led from the toilet to the holding tank or the toilet directly overboard. From the holding tank, the hoses led through a “Y” valve to either the macerator pump and overboard, or to the deck pump-out fitting. And then there was the vent hose from the top of the holding tank to the vent high on the topsides.
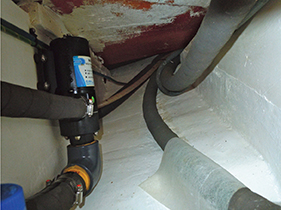 When Mo’ was built, most of these hoses were undoubtedly installed before the bulkheads and cabin sole. Easy. Now, parts of the cupboard in the head would have to come out. There was one wire tie about a foot out of my reach under the sole binding several hoses together that had to be removed before any of this could happen. I was in over my head and I knew it. Even if I could figure it all out, there were parts of the job that would require a sort of push-from-one end, pull-from-the-other maneuver under the sole where I couldn’t see.
In a panic, I called my friend CJ, upon whom I depend when I am “conceptually and/or physically unable.” He has many years of experience and I told him that while I wanted some help, I didn’t want him to do the job for me. Lucky for me, CJ is a patient man and said yes. I called and ordered the hoses.
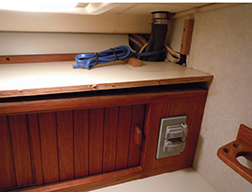
CJ figured this job would take him about two days with my help—did you notice the not so subtle transition from my doing it with his help to the other way around? I tried, before he came, to minimize that time by removing the seemingly hundreds of wire ties securing the old hoses (there were actually about 35)—even the out-of-reach ones that I got to with a pair of long-handled pruners. I also took everything out of the hanging locker and the cupboards in the head and almost completely dismantled the cupboard. In fact, I still have a cup holding about 20 screws, and I have no idea where they go!
At this point in the process, I got a phone call from my husband in Ohio and had to go home, leaving CJ to fend for himself. Full disclosure would prompt me to admit that both CJ and I were probably pleased by this eventuality.
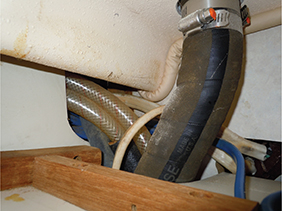
The process was complicated, CJ told me during our debriefing, by the fact that there were several places that the hoses went through a bulkhead or the shelf of the cupboard. The new, better hose turned out to be slightly thicker-walled, making it larger in outside diameter while being the same inside diameter, so the holes through which it went had to be enlarged—and these places were not ones easily accessed by a man with a saw. CJ ended up using a Dremel tool with a sanding barrel in some places and a drill in others, making many holes in a line and then connecting them. Also, the vent was clogged with what turned out to be a leafy-looking fungus and the screened vent itself needed replacement. Of course, said vent was in a space nearly impossible to reach, behind the bulkhead. CJ needed help on a couple of occasions to do the push-pull thing. The bottom line is that the job we thought would require 16 hours ended up requiring 32 hours and a good deal more angst than estimated.
 Today, my nose is delighted with the way MoDachaidh smells (or rather doesn’t smell) and the job is done. The whole project cost about twice what I had hoped, but isn’t that always the way with boat jobs? Still, the grand sum was less than half the original estimate of $5,000. And most importantly, Mo’ smells like a million bucks!
Linda Amstutz started sailing 30 years ago on Chippewa Lake in a 17-foot Thistle. She raced with friends on Lake Erie for 15 years, then bought the first MoDachaidh (a Tartan 33), later trading it for her current IP 380. After a year in Lake Erie, Mo’ yearned for the ocean, so Linda and her intrepid boat cat Paddy now sail the high seas. Linda just finished her first novel…stay tuned!