


(published February 2013)
Wi-Fi technology has been around for a long time, but its use on boats opens up a myriad of technical possibilities that don’t often apply to shoreside use. We’ve been keeping you up to date on the exciting tools and software available for navigation, entertainment, and shipboard monitoring and management. Now, with the explosion of new devices taking advantage of wireless network capabilities, it’s time to take a look at how to get the most out of Wi-Fi aboard your vessel.
TYPES OF WI-FI
Without getting into technical specifics, from a practical standpoint there are two major types of Wi-Fi networks: those that exist somewhere else, which (presumably) you want to access; and those that you create using devices on your vessel in order to access, control or otherwise utilize things you own. Let’s look at each of these situations in detail.
ACCESSING SHORESIDE SYSTEMS
The most common use of Wi-Fi aboard vessels until recently was specifically to access shoreside Internet connections. Most of you have probably done this at some point, or tried and cursed “the marina Internet” for not working so well. Some of you may even have bought special add-on hardware for your boat to try and alleviate some access issues or give yourself more range. On the water, it’s common to have some issues accessing shoreside Wi-Fi for a variety of reasons. The shoreside service may have a badly located antenna, low power, or be located in a radio-noisy environment. Or it might be in a good location, but your boat is conversely in a “bad” one.
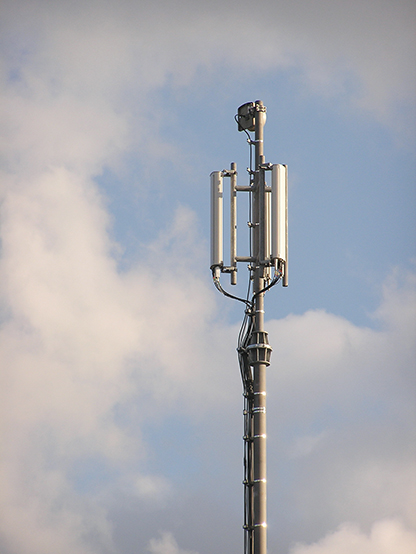
It’s important to keep in mind that at its core, Wi-Fi is quite literally nothing more than an ultra-high-frequency radio. As such, Wi-Fi networks behave similarly to, but not exactly like, your typical VHF radio with respect to noise on the channels, range, antenna height and placement, etc. Thus, just because your install is good doesn’t completely make up for the other end having a bad install, or vice-versa.
BETTER QUALITY ACCESS
There are a variety of fixes for poor shoreside access. The best solution is typically to relocate your Wi-Fi antenna to get better line-of-sight to the marina’s Wi-Fi access point. Since most computers and smartphones don’t allow you to simply connect an external antenna to their built-in radio, this usually means you need to buy a dedicated Wi-Fi interface that has a connection for an external antenna. These come in various flavors, from those built into network hubs to dedicated USB models that serve only the computer they are connected to. Many offer higher power radios (also known as “Wi-Fi boosters”) that can get your side of the signal out a bit further, and this can often help in marginal situations where breaking through some electronic noise is needed on your part. Think of it as shouting louder to be heard over a crowd. However, just like shouting, a higher-powered radio doesn’t help you hear the shoreside transmitter any better—this is where antenna gain and placement become more critical.
 ANTENNAS—GAIN AND PLACEMENT
Gain can be a confusing subject, and the usefulness of extremely high-gain antennas is endlessly debated for a variety of situations. Gain is effectively a “shaping” of the antenna’s reception area. Think of it as cupping your hands around your ear to help reduce noise from one direction so you can hear better in the other. As a result, the more gain you get, the more directional your antenna becomes, and the more accurately you must keep it pointed directly at the transmitting antenna if you wish to hear its signal.
High-gain antennas are troublesome for boaters—your boat is likely to roll a bit in the wake, waves or wind, and that will easily knock a high-gain antenna off the transmitting site long enough to stall the connection and cause frustrating dropouts. A gain of about 8dBd is about the most you’ll ever want to use on a boat, and after much personal experimentation and consultation with other long-term sailors, I have empirically found that antennas with a gain of 4-6dBd work the best, especially if you spend time at anchor where you roll around a lot more and shift your heading frequently with the wind or tide. These antennas will allow you to pick up as much from the shore as you are reasonably likely to do so, and remain connected under more relative boat motion than the higher gain varieties.
Antenna placement is also key: you want the antenna high enough that its direct line of sight is approximately aimed right at the transmitting antenna with as few other obstacles in the way as possible. Since you’ll be using a lower gain antenna that has a wider tolerance, you can actually put the antenna a little bit higher than optimal, which often allows you to get over the top of parked cars, fly bridges, radar arches, solar panels and other Wi-Fi obstructing constructions that tend to be lower to the ground. Mount it too high, though, and you run the risk of losing the signal when the boat heels the wrong way a bit too much, or overshooting the antenna entirely. This is where a bit of adjustment is handy. I often fly my Wi-Fi unit from a spreader on a flag halyard, where I can adjust the height according to the range and obstructions I find between my boat and the shoreside antenna.
A typical vessel’s solution to better shoreside Internet access, then, centers around two major components—a more powerful radio on the boat that gets your side of the signal across a longer distance and through more electronic noise, and a modest gain, properly placed antenna to help hear the shoreside radio more clearly and not lose the signal as the boat moves naturally in the berth or at anchor.
CREATING YOUR OWN WI-FI
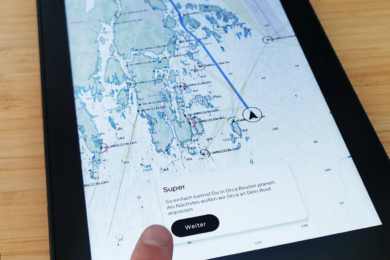
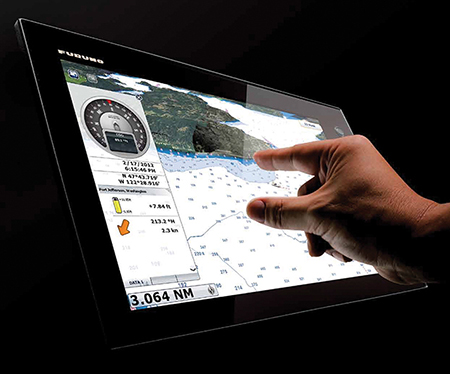
Now that shoreside Internet access is nearly ubiquitous, there is a new opportunity that’s recently hit the mainstream with a fervor: local Wi-Fi networks directly on your vessel. We’ve discussed these and their fascinating advantages in Blue Water Sailing before, and a quick perusal of the new gear coming from the major vendors shows a proliferation of Wi-Fi enabled equipment and even apps for smartphones and tablet computers to take advantage of their specific features.
While the market is still rapidly growing and changing, there are many generalities that will help demystify this technology and clue you in as to how best make use of it aboard. I must of course start with another somewhat basic but frequently overlooked fact: having Wi-Fi does not mean you have Internet access. The two are not the same. Wi-Fi is simply a network. It connects whatever is using that Wi-Fi together to share data. If one device using that network offers Internet access, then everything on that Wi-Fi network can share that access. But in many cases, and aboard your ship is one very important case, the Wi-Fi network is serving a different purpose entirely: that of providing private, protected, but convenient wire-free access to critical systems such as your boat instrumentation, position, chartplotter, environmental controls, entertainment systems, etc. In this case, you don’t necessarily wish to share all of those devices with the general public. And you certainly can’t take the shoreside Internet connection with you out to sea. So using that connection as the basis for your local needs is not an option. What you need to do is create your own Wi-Fi network, and attach the devices you wish to include on it.
It is also important to discuss the specific components of a Wi-Fi network. The network is “created” out of thin air (or, more precisely, coordinated and managed) by a device called an “access point” or AP. This device sets the name of the network, establishes security and manages all of the devices that are allowed to be part of the network. It is, in effect, the “central hub” of the network.
Creating a network is actually quite simple: many modern chartplotters already offer Wi-Fi integration and can serve as the access point. A variety of vendors offer NMEA to Wi-Fi gateways that also act as access points. You can even buy an ordinary Wi-Fi router from a computer store, use that as your access point, and have your chartplotters and other devices join that network instead of creating their own. Depending on your devices, this may be the best route to take in some circumstances. Regardless of which device creates the network, all Wi-Fi equipped devices including entertainment centers (Xbox, AppleTV, Sonos, etc.) can join the network, so you can integrate your laptop, smartphone, iPad, etc. for use as both a navigation tool and an entertainment device without having to switch between Wi-Fi networks to do it.
A NOTE ON WI-FI SECURITY
Like a VHF radio, Wi-Fi is essentially unencrypted; anybody with a computer can join your network and start listening to your data. This might not seem like a big deal (“So what if they see my GPS position while I’m in the dock?”) until you realize that not only is it a dead giveaway to what equipment you have on board and precisely where it is located, but it’s an easy back door entry to your computer, which is sitting on an unsecured network, more vulnerable to viruses, spying and even identity theft. Beyond the security concerns, there is one convenience factor that should convince you to secure your network: often there is more than one boat in a marina using the same brand of equipment. If both of your Wi-Fi devices are on and you’ve used the default settings, your laptop may join their network and vice-versa, giving you both inaccurate readings (perhaps his engine temperature runs hotter than yours) but also potentially causing confusion (you upload the wrong charts to her chartplotter and/or delete suddenly unfamiliar waypoints). This is a recipe for frustration, if not serious trouble, and it’s important that you pay attention to a few words about Wi-Fi security.
The first step is to never use a default name for your Wi-Fi network. Always change the name of any network you create to something meaningful and memorable for you. The name of your boat isn’t necessarily a bad idea, but for security I recommend you make it a little less directly obvious whose Wi-Fi just turned on in the area.
The second step is the most important one: Wi-Fi networks offer a few options for encrypting and securing access to the network. These have a variety of technical names, but the one you really want to look for is somewhat confusingly named WPA2. Don’t worry about what it means—it’s what you want nevertheless. Activating then on your Wi-Fi access point allows you to type in a passphrase (much like a password on a computer), which other devices must also enter if they wish to join your network. This is the best way to secure your network.
BEWARE CHEAP GEAR
For those of you with slightly more technical prowess, there’s a bit of a catch to beware: some marine vendors are staying cheap on their Wi-Fi hardware and lazy with their software, meaning that they create a lower class of network (called an “ad hoc” network). In addition, some devices refuse to join another Wi-Fi network, insisting on creating and staying on their own ad hoc network. These devices are particularly troublesome as you always have to switch to their network to use them, but because it is difficult to get other devices to share an ad hoc network you often have to switch back to a different network to use your other devices.
There are many other frustrating pitfalls with ad hoc networks, including reliability issues and complicated device setup. So while it is occasionally unavoidable, I highly recommend you avoid any marine Wi-Fi gear that cannot create a proper “access point” or join an existing wireless network. Either option will suffice, but forcing you to use ad hoc networks and refusing to join a proper Wi-Fi network is inexcusable at this point in technology.
It’s fairly easy to tell whether you are getting a quality Wi-Fi enabled device: read the manual before you buy it. If there is a section explaining how to join an existing Wi-Fi network (including one that uses WPA2 security) or a setting on configuring the built-in Wi-Fi network that includes changing the network name and using WPA2 security, you are likely to be getting one of the better quality devices.
 FINAL THOUGHTS
I should mention in closing that there is a hybrid network that combines everything we just discussed and uses two separate Wi-Fi radios—one that interacts with a shoreside access point, and one that creates a local access point on your ship. Thus, a link to the Internet via the second radio is established (within range, of course), which is directly connected to your shipboard network. With some clever security features in place to protect your onboard network, this is a very handy solution and is what I currently have set up on my own boat. Just remember that you are simultaneously creating your own network and using another established network, and don’t get confused about which is which! Many vendors offer a packaged solution for this, which almost entirely eliminates the confusion and provides easy-to-use software for managing the network link—a simple proposition with a big upside.
All in all, Wi-Fi aboard ship opens up a world of new possibilities, including tablet navigation and instrumentation, entertainment, and enhanced communications. When done right, it can be simple, secure and effective, and by keeping in mind the principles in this article you can avoid a lot of the common misconceptions and pitfalls surrounding the concept.
Daniel Collins, an ASA certified sailing and navigation instructor, amateur extra class radio operator and small boat racer, enjoys experimenting with marine electronics. He is also actively involved in community-driven social change. Email him at daniel@oddasea.com, or read his blog at www.oddasea.com.