


Giving your electronics a spring-cleaning is easy and fast to do, can prevent problems before they start and helps ensure maximum reliability from your gear (published April 2013)
It’s the time of year in the Northern Hemisphere when the grasp of winter loosens and thoughts turn to sunnier days ahead, particularly, sunny days on the water out sailing. After the high-humidity days of winter, or depending on your area, before the upcoming spring monsoons begin in earnest, why not take some time to look over your boat’s electrical and electronic systems to ensure everything is ready for the season ahead?
Here’s an easy to follow walkthrough that will make this important task dead simple and may even alert you to some potential issues that could be fixed before they become serious problems on the high seas. This is also an excellent starting point for a do-it-yourself survey of your boat or another vessel’s electronics, so keep it handy anytime you want to complete a full systems check. The added peace-of-mind is a bonus.
GENERAL PRINCIPLES
This walkthrough is organized by topic for clarity, but it often makes the most sense to examine the boat systems in a different order, such as starting at the bow and moving aft, or looking at one complete system at a time (e.g. all NavNet, all SeaTalk, etc.). Take the route through your boat that makes the most sense.
As you go through the boat, take a notepad and digital camera with you. Record all connections, wiring locations and as much of the back, front and mounting positions of all devices as you can. It often helps to keep both a written and visual record for diagnostics later, or if you are not on your boat but need a model or serial number. Also, you’ll have a record of the way things were in case something comes loose or you remove it for repair only to forget if the red or blue wire went to the data IN port.
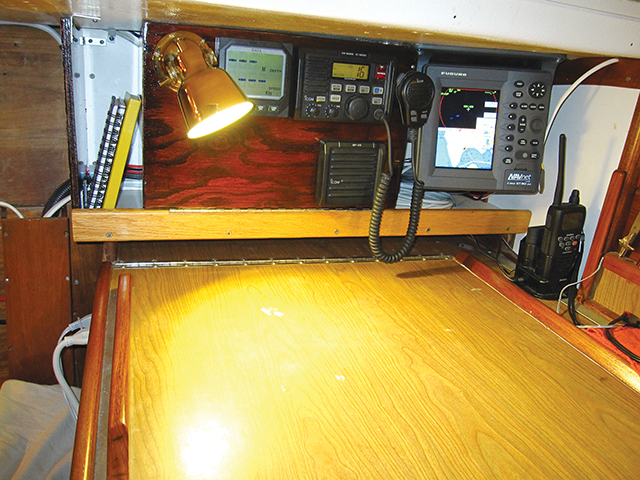
Tips: I typically start on deck at the helm station, then progress from aft forwards, but saving the main navigation station for last as it is often the most complicated. This prevents me from forgetting to check the odd sensor in the bow and ensures that if twilight comes on before I’m done, the only remaining work is below decks where weather and sunlight are not an issue.
Record with the camera the connections as they are now for future reference, and put all photos together in a single folder on your computer. Call it Electronics Spring Cleaning 2013 so you can find it later. Each year make a new folder, and you’ll have an easily remembered place to check if you need to refer to them later.
Always be on the lookout for corroded connectors, damaged or missing mounting bolts/frames, frayed wires, cut or damaged insulation and other visible problems. Make a note or fix them immediately if you can.
Watch out! Nicked insulation can allow water and corrosion to get to the core of a wire even if you cannot see that the nick goes all the way through—some insulation materials look like they are sealed when there is in fact a tiny gap. This is enough to cause serious damage over time to the wire and has led to things like water level sensors not working or bilge pumps that appear to work when the bilge is empty but fail when fully loaded with water, so take this seriously.
SYSTEM-BY-SYSTEM CHECKLIST
While we can’t cover every possible piece of gear aboard, the topics and items mentioned here will guide you through the major systems most vessels are equipped with and many you may have forgotten. If something here jogs your mind about another piece of gear you have, add it to your personal checklist and then send us a note so we can include it next year.
As you go through this list, you may need to refer to the equipment manuals for how to do certain things. This quick mental refresh often comes in handy in high-pressure situations out on the water, so take the time to read them if you need to—consider this part of the “spring cleaning” for your seamanship.
ELECTRONICS
NAVIGATION SYSTEM
All power wires and data cables and connectors should be corrosion-free, clean and moisture-protected.
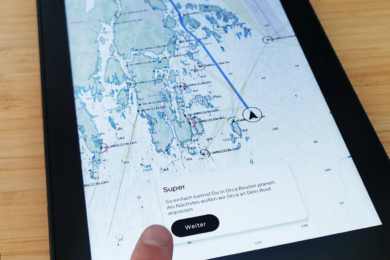
Check chart dates and coverage to ensure you have recent updates and appropriate charts for your intended sailing areas. Review any Notice to Mariners provided for your charts and dates.
Calibrate your compasses. This is especially important for fluxgate-type compasses which need to be recalibrated whenever new metallic equipment is put on board or existing large metallic objects are moved around—it’s likely this hasn’t been done since the last time you relocated that big bag of wrenches, so go ahead and take the boat for a spin and recalibrate that fluxgate.
Don’t forget that the binnacle compass is also affected, so double-check its calibration as well—a hand bearing compass can get you within five or so degrees but if you see some significant deviation on certain headings you may want to consult a professional to have the compass “swung”, or learn how to do it yourself (it’s not hard!).
Check any chartplotter networking (e.g. SeaTalk, NavNet, etc.). Make sure all devices show up and are sending valid data.
Check your radar unit, if equipped, by turning it on and letting it warm up, then transmitting. Make sure that what you see around you is what you expect for your area, and that all equipped features such as range or chart overlay work as expected.
Clean depth sensor and speed paddlewheel if you keep them in the water year-round.
Check wind angle and speed sensors for good data and inspect at the masthead for any damage or dirt buildup. Birds are especially notorious for damaging anemometers, but excessive winds, hail and lightning can do their own damage. Wind instruments often fail “stuck”—sending data to the display but not updating it appropriately for conditions.
Just because you see numbers doesn’t mean they are correct, so take the extra minute or two to verify that what you are seeing is indeed accurate for the conditions.
WiFi, USB and SERIAL DATA DEVICES
Check serial and USB cables for corrosion, especially the ones that connect any handheld GPS to your chart plotter or laptop. Don’t forget to check your backup cables.
If equipped, double-check that you can connect your laptop or tablet to your boat’s chart plotter, data network or WiFi network. Don’t forget to check for any updates to the charts on your laptop or tablet.
This is a good time to teach your sailing partners or kids how to connect the laptop or tablet to the boat, in case they need to do it (e.g. while you’re at the helm).
VHF RADIOS, AIS, OTHER COMMUNICATIONS
Check VHF radio antennas and connections for corrosion and the cable for chafe and damage. If you have an SWR meter, follow the instructions to make sure the SWR on your VHF radios is less than 2.0.
If you don’t have an emergency VHF antenna, consider getting one. If you get dismasted your VHF antenna is likely destroyed and a handheld radio does not have much range or power. A proper emergency antenna can be the difference between reaching help or being out of range.
If your VHF is equipped with DSC, verify that the radio is properly receiving GPS data from the plotter or onboard GPS receiver. See the radio manual for details and review our September and October 2011 issues for more information on DSC if this topic is new to you—it could literally save your life or your boat.
Also ensure your DSC-equipped radio has the proper MMSI for your vessel – this helps the USCG find and identify your ship in the event of a distress and provides enhanced DSC functionality.
If you have AIS, check the antenna and cabling for corrosion and check the AIS unit for any error conditions.
If you are in an area with AIS traffic, check that the data is received and your plotter or computer properly shows other AIS targets.
If you have an AIS class A or B transponder, check that your MMSI and other ship information are correct and remain accurate.
SSB AND SHORTWAVE RADIO SYSTEMS
Check the radio and tuner grounds, especially the copper foil or braid that connects the tuner to the ground plane.
Check that the radio and tuner are properly working together. Try tuning some frequencies you don’t normally connect to and make sure the tuner gets a good match.
Test receive using WWV or other strong stations in your area.
Test transmit, if you are so equipped, with either a buddy boat or, if licensed, on a working ham band. Maybe check in with the Maritime Mobile Service Network and give them some thanks for being there for us.
If you have a PACTOR modem, check that you can connect your laptop to it and check your maritime email service. Sometimes this is difficult in a harbor due to electronic noise and other issues, but it never hurts to try a couple different stations for practice and to make sure your computer, modem and radio all work as expected.
AUTOPILOTS
Ensure your autopilot is receiving appropriate network information, if equipped, such as waypoints, compass or heading data and wind data.
Check the drive mechanism for lubrication, corrosion, loose or damaged hardware such as slipping bolts or worn cotter pins.
Ensure you can easily locate spares and emergency parts.
Check all cables for chafe and proper tension.
OTHER SYSTEMS AND INFORMATION
Infrared/Visual Imaging such as FLIR and security systems.
Sonar/Fishfinders/Forward Scan Sonar for functionality—these sensors often get fouled by sea life and may need cleaning.
Handheld VHFs and battery chargers.
Handheld GPS systems, batteries, chargers and any network ports or serial cables.
Waterproof cases for phones, iPads, VHFs, etc.
All electronics in your ditch bag, including batteries—check the expiration dates!
EPIRBs/PLBs: check battery dates on your unit and verify registration information online at http://www.beaconregistration.noaa.gov/
If you have previously applied for a Federal Radiotelephone Ship Station License and Operator License: check your expiration dates and registration data at http://wireless.fcc.gov/uls and make sure you have the licenses onboard for each crewmember that will be using the equipment. You can check your MMSI registration there as well.
If you applied for an MMSI elsewhere (e.g. through Boat US, the US Power Squadron, or other affiliates who can provide MMSI numbers) check with the organization that issued yours to ensure they have up to date registration info.
GENERAL ELECTRICAL SYSTEM
Inspect switchboards, panels, circuit breakers and fuses.
Ensure you have spare fuses of the right size and rating on board and easily accessible.
Check battery cabling and clean the terminals.
If you use standard flooded batteries, check the fluid with a battery hygrometer. You can get one at your local parts store and any competent auto mechanic will know how to use it if you need help.
Take a close look at your engine wiring, electronics, gauges and level sensors for any corrosion, frayed or damaged insulation or wiring, and loose connections.
Inspect bilge pumps, float switches, blowers, fans and other safety-related wiring and systems.
Check navigation lights and ensure you have spare bulbs (if applicable) on hand. Don’t forget the tricolor, steaming (a.k.a ‘masthead’) and anchor light.
LIGHTNING PROTECTION SYSTEM
If you have a lightning protection system installed onboard, check the bonding and grounding wires for corrosion. If you find significant damage, it’s often best to replace the whole wire as corrosion can “wick” its way up the inside of the wire and reduce or eliminate any protection offered.
Tip: It’s often best to unscrew, clean, and replace all connections for the lightning and grounding systems on a ship. This removes any minor corrosive buildup and can help reduce or eliminate variations in the ground voltage that can cause problems later.
Thru-hulls and discharge plates should be inspected for corrosion, pitting and other damage if they are connected to the lightning system. If you find serious metal loss you may have galvanic corrosion that can sink your boat— get experienced professional help quickly.
MISCELLANEOUS SYSTEMS
Battery chargers: check for corrosion, especially around the battery terminals where the protective coating gets worn down over time.
Spare batteries: check expiration dates and service any rechargeable batteries with a maintenance charge.
Handheld flashlights: check bulbs, batteries and spares.
Smoke, Carbon Monoxide and Propane detectors: test as described in the manual, and replace batteries if due.
Propane solenoids and shutoff switches: test and service as described in the manual for the device.
Daniel Collins, an ASA certified sailing and navigation instructor, amateur extra class radio operator and small boat racer, enjoys experimenting with marine electronics. He is also actively involved in community-driven social change. Email him at daniel@oddasea.com, or read his blog at www.oddasea.com.